 张sir的部署
张sir写的部署过程, 我照搬了过来, 里面涉及到的知识点感觉还挺有用的, 遇到相关问题可以参考下, 哈哈哈!!
# before
部署项目是一个复杂且麻烦的过程:
- 平台不同,ubuntu、Windows iis、centos7;
- 项目不同,它依赖的三方软件也不同,要求也不同;
- 大家的水平也不同,小白的话,有点难;
- 对于云服务器也不太了解,设置安全组/防火墙;
- 对于MySQL软件的用户、权限设置不清楚;
- 对于Linux、云服务器、nginx,都要有了解。
- 对于查看各种日志不了解;500 ERROR
- 项目本身在本地都跑不通的这些bug,没有解决的,就上线;
- 项目开发中,在某些具体功能中把代码写死的,比如连接
127.0.0.1的本地开发环境的配置;
务必要记住
- 本地开发环境,在把项目代码上传到云服务器之前;要在本地进行足够的测试;而且,要把所有连接本地的一些配置,都要改为线上环境的;在项目中,写死的路径、连接,一定要统一的放到配置文件中。
d:\xx\xxx\xx.txt - 尽量避免出现中文路径和中文文件名。包括一些特殊字符。
# 物料准备
基于centos7 + nginx + mysql + redis + uwsgi + django + ssl + 备案好的域名完成的部署。
所以需要准备:
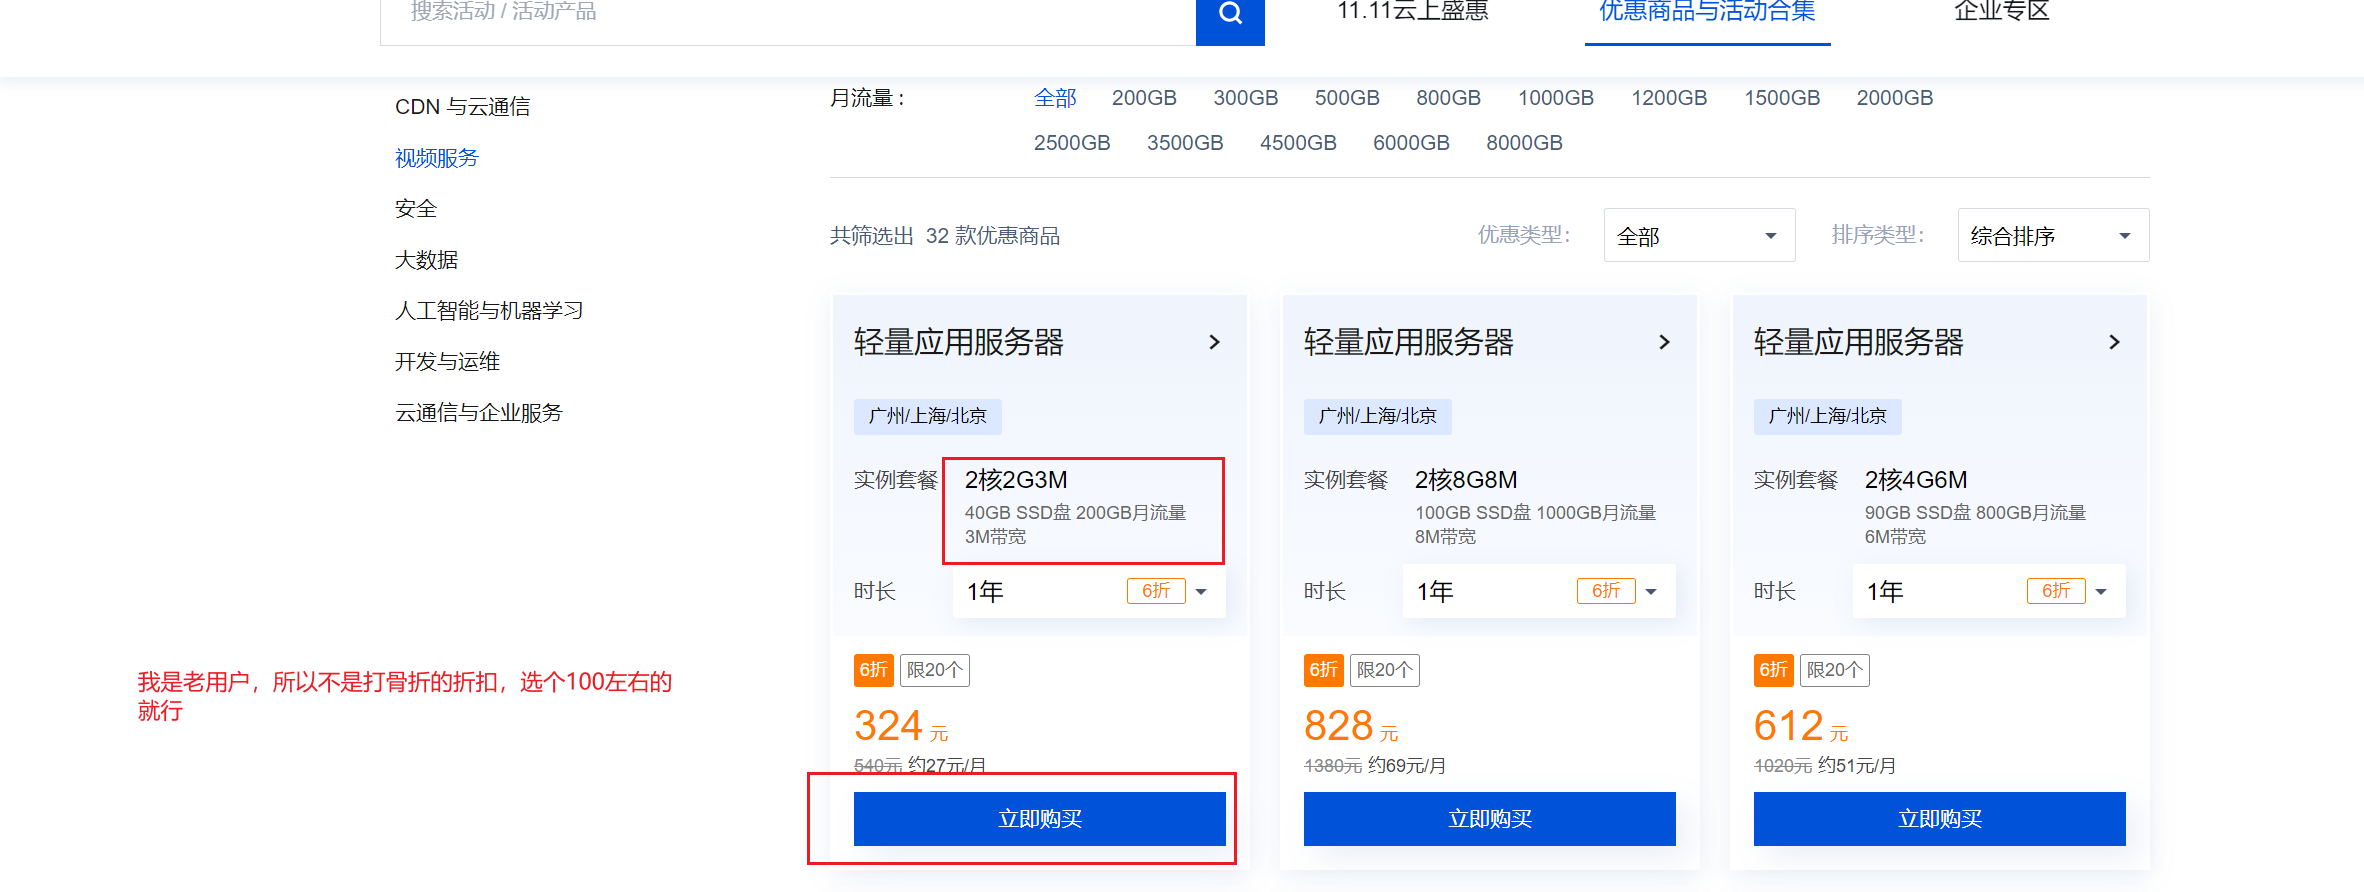
- 一个云服务器,配置要求:2核2G内存,带宽,阿里1M;腾讯300M/400M都行;硬盘40G+;系统是cnetos7.x(7.3/7.5/7.6)。
- 云服务器这块,一般新用户优惠一年100元左右;但如果续费可就不是这个价了。
- 申请并购买域名,域名和云服务器厂家选择一致就行。
- 本地要安装xshell、xftp,个人免费版本;
- 本地准备并调试好你的项目。
# 本地项目准备
# 项目下载与测试
将项目下载到本地,然后创建虚拟环境,并且下载项目依赖包。
# 拉代码到本地
git clone https://gitee.com/wupeiqi/day13

# 终端命令
pip install virtualenv

virtualenv venv
.\venv\Scripts\activate
pip -V
cd day13
pip config set global.index-url https://pypi.tuna.tsinghua.edu.cn/simple
pip install --no-cache-dir -r requirements.txt
2
3
4
5
6
7
8
9
10
11
12
# 在本地让项目跑起来
把项目中所有的数据库连接、或者其他连接本地的,都需要调整为线上环境的。
settings.py
ENVS_ = 'local'
# ENVS_ = 'test'
# ENVS_ = 'pro'


try:
    if ENVS_ == 'local':
    # 放到最后,是为了将前面的覆盖吗
        from .local_settings import *
    elif ENVS_ == 'pro':
        from .pro_settings import *
except ImportError as e:
    print(f'------------> 项目导入{ENVS_}环境配置报错 <------------>', e)
2
3
4
5
6
7
8
9
10
11
12
13
pro_settings.py:
# MySQL配置
DATABASES = {
    'default': {
        'ENGINE': 'django.db.backends.mysql',
        'NAME': 'bms',    		#你的数据库名称
        'USER': 'root',   		#你的数据库用户名
        'PASSWORD': '666666', 	#你的数据库密码
        'HOST': '', 			#你的数据库主机,留空默认为localhost
        'PORT': '3306', 		#你的数据库端口
    }
}
2
3
4
5
6
7
8
9
10
11
12
local_settings.py:
import os
from pathlib import Path

# Build paths inside the project like this: BASE_DIR / 'subdir'.
BASE_DIR = Path(__file__).resolve().parent.parent
# sqlite3
DATABASES = {
    'default': {
        'ENGINE': 'django.db.backends.sqlite3',
        'NAME': os.path.join(BASE_DIR, 'db.sqlite3'),
    }
}

# MySQL配置
# DATABASES = {
#     'default': {
#         'ENGINE': 'django.db.backends.mysql',
#         'NAME': 'bms',    		#你的数据库名称
#         'USER': 'root',   		#你的数据库用户名
#         'PASSWORD': '666666', 	#你的数据库密码
#         'HOST': '', 			#你的数据库主机,留空默认为localhost
#         'PORT': '3306', 		#你的数据库端口
#     }
# }
2
3
4
5
6
7
8
9
10
11
12
13
14
15
16
17
18
19
20
21
22
23
24
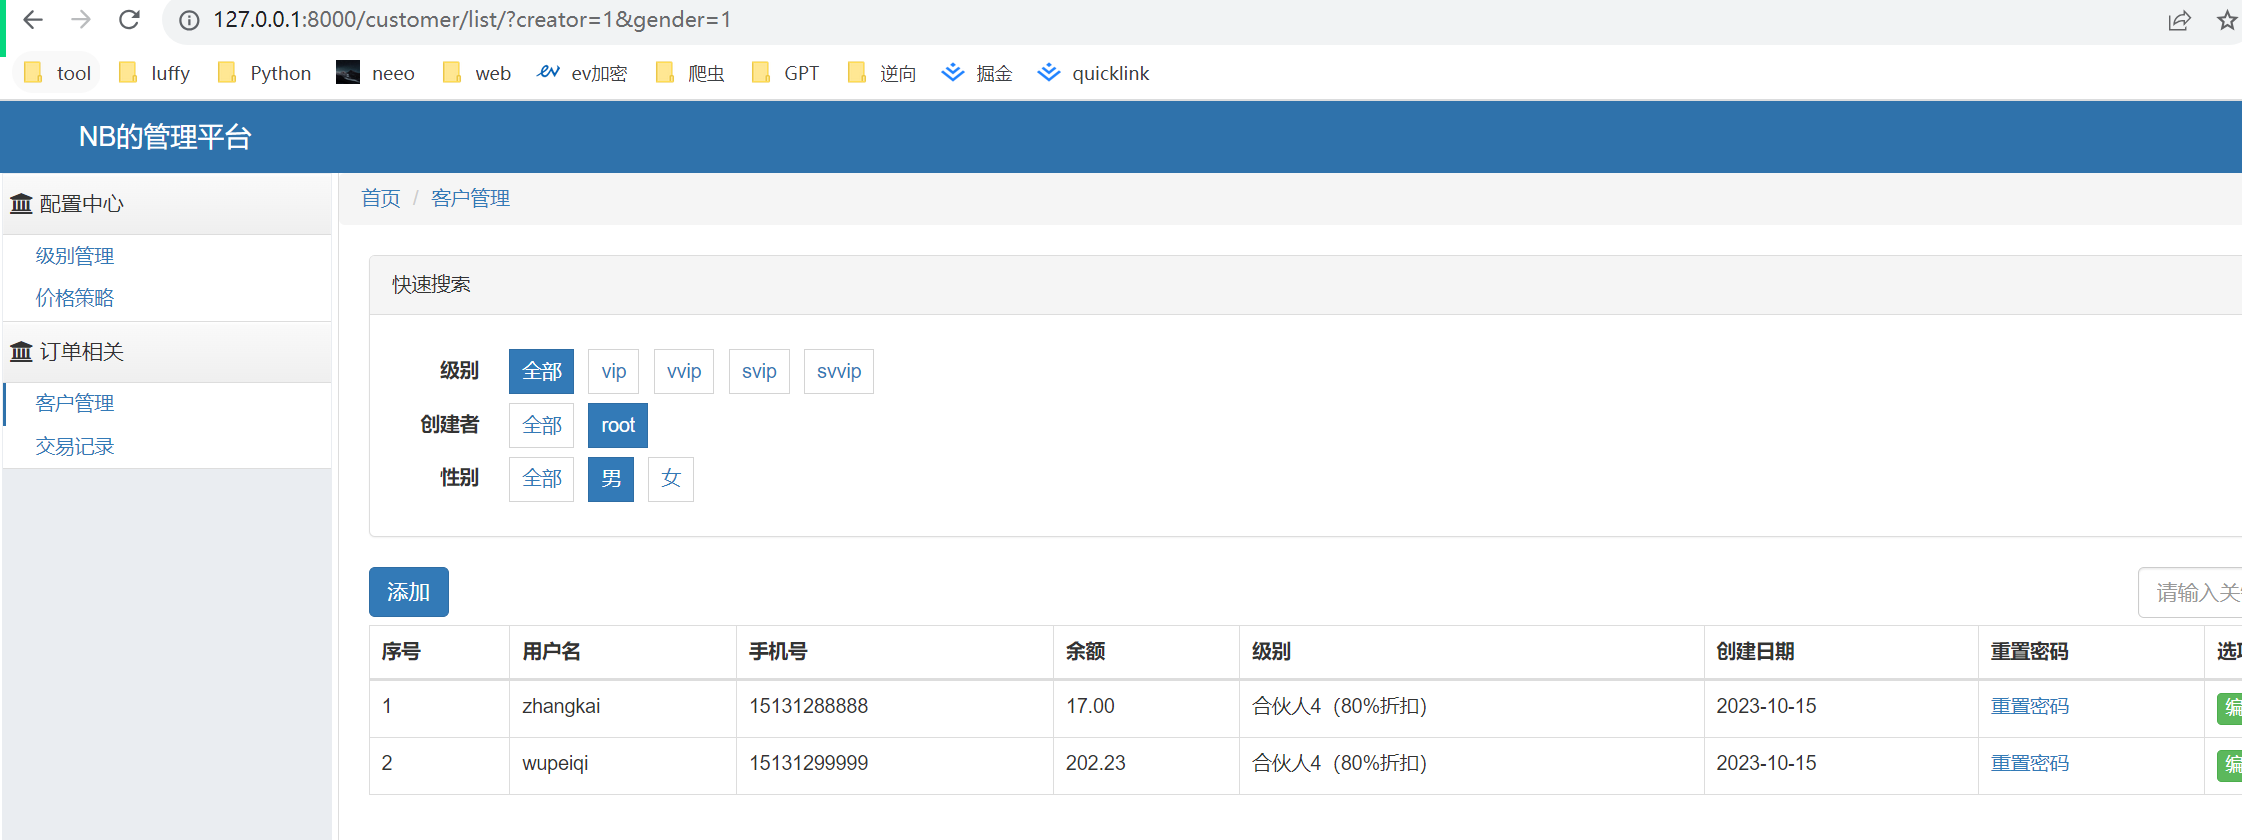
访问http://127.0.0.1:8000/login/登录,用户名是root,密码是 qwe123,角色是管理员。
# 本地环境:sqlite3数据迁移到MySQL中
- 先根据配置sqlite3的配置文件,生成
data.json文件:
import os

DATABASES = {
    'default': {
        'ENGINE': 'django.db.backends.sqlite3',
        'NAME': os.path.join(BASE_DIR, 'db.sqlite3'),
    }
}
2
3
4
5
6
7
8
然后执行:
python manage.py dumpdata > data.json
- 有了
data.json文件,把sqlite3的配置文件注释掉,配置上MySQL的配置选项,在local_settings.py中操作:
# -*- coding = utf-8 -*-
import os
from pathlib import Path

# Build paths inside the project like this: BASE_DIR / 'subdir'.
BASE_DIR = Path(__file__).resolve().parent.parent
# sqlite3
# DATABASES = {
#     'default': {
#         'ENGINE': 'django.db.backends.sqlite3',
#         'NAME': os.path.join(BASE_DIR, 'db.sqlite3'),
#     }
# }

# MySQL配置
DATABASES = {
    'default': {
        'ENGINE': 'django.db.backends.mysql',
        'NAME': 'day13',  # 你的数据库名称
        'USER': 'root',  # 你的数据库用户名
        'PASSWORD': '123',  # 你的数据库密码
        'HOST': "127.0.0.1",  # 你的数据库主机,留空默认为localhost
        'PORT': '3306',  # 你的数据库端口
    }
}
2
3
4
5
6
7
8
9
10
11
12
13
14
15
16
17
18
19
20
21
22
23
24
25
- 在终端中创建好数据库,再下载pymysql模块,用于和MySQL连接:
# 登录到MySQL中
create database day13 CHARSET utf8mb4 COLLATE utf8mb4_bin;


pip install pymysql

# 然后在settings.py同级目录添加
import pymysql

pymysql.install_as_MySQLdb()
2
3
4
5
6
7
8
9
10
关于连接MySQL数据库,用两个模块:
mysqlclient,这个模块优先选择,直接pip install mysqlclient下载,然后直接运行项目,如果报任何和mysqlclient的错误。一律不处理。直接改用pymysql。
pymysql,pip install pymysql下载,然后再settings.py文件的同级目录找到
__init__.py文件,添加如下代码。import pymysql pymysql.install_as_MySQLdb()1
2mysqlclient和pymysql用法一致,只不过pymysql多了一步配置而已,就上面的两行代码。
- 执行数据库迁移命令,并根据
data.json文件,将数据导入到MySQL的数据库中:
python manage.py makemigrations
python manage.py migrate
python manage.py loaddata data.json  # 执行这个命令肯定报错
2
3
报错:
(venv) D:\tmp\od\day13>python manage.py loaddata data.json
Traceback (most recent call last):
  File "D:\tmp\od\venv\lib\site-packages\django\db\backends\utils.py", line 89, in _execute
    return self.cursor.execute(sql, params)
  File "D:\tmp\od\venv\lib\site-packages\django\db\backends\mysql\base.py", line 75, in execute
    return self.cursor.execute(query, args)
  File "D:\tmp\od\venv\lib\site-packages\pymysql\cursors.py", line 153, in execute
    result = self._query(query)
  File "D:\tmp\od\venv\lib\site-packages\pymysql\cursors.py", line 322, in _query
    conn.query(q)
  File "D:\tmp\od\venv\lib\site-packages\pymysql\connections.py", line 558, in query
    self._affected_rows = self._read_query_result(unbuffered=unbuffered)
  File "D:\tmp\od\venv\lib\site-packages\pymysql\connections.py", line 822, in _read_query_result
    result.read()
  File "D:\tmp\od\venv\lib\site-packages\pymysql\connections.py", line 1200, in read
    first_packet = self.connection._read_packet()
  File "D:\tmp\od\venv\lib\site-packages\pymysql\connections.py", line 772, in _read_packet
    packet.raise_for_error()
  File "D:\tmp\od\venv\lib\site-packages\pymysql\protocol.py", line 221, in raise_for_error
    err.raise_mysql_exception(self._data)
  File "D:\tmp\od\venv\lib\site-packages\pymysql\err.py", line 143, in raise_mysql_exception
    raise errorclass(errno, errval)
pymysql.err.IntegrityError: (1048, "Column 'create_date' cannot be null")

The above exception was the direct cause of the following exception:

Traceback (most recent call last):
  File "D:\tmp\od\day13\manage.py", line 22, in <module>
    main()
  File "D:\tmp\od\day13\manage.py", line 18, in main
    execute_from_command_line(sys.argv)
  File "D:\tmp\od\venv\lib\site-packages\django\core\management\__init__.py", line 442, in execute_from_command_line
    utility.execute()
  File "D:\tmp\od\venv\lib\site-packages\django\core\management\__init__.py", line 436, in execute
    self.fetch_command(subcommand).run_from_argv(self.argv)
  File "D:\tmp\od\venv\lib\site-packages\django\core\management\base.py", line 412, in run_from_argv
    self.execute(*args, **cmd_options)
  File "D:\tmp\od\venv\lib\site-packages\django\core\management\base.py", line 458, in execute
    output = self.handle(*args, **options)
  File "D:\tmp\od\venv\lib\site-packages\django\core\management\commands\loaddata.py", line 102, in handle
    self.loaddata(fixture_labels)
  File "D:\tmp\od\venv\lib\site-packages\django\core\management\commands\loaddata.py", line 163, in loaddata
    self.load_label(fixture_label)
  File "D:\tmp\od\venv\lib\site-packages\django\core\management\commands\loaddata.py", line 253, in load_label
    if self.save_obj(obj):
  File "D:\tmp\od\venv\lib\site-packages\django\core\management\commands\loaddata.py", line 209, in save_obj
    obj.save(using=self.using)
  File "D:\tmp\od\venv\lib\site-packages\django\core\serializers\base.py", line 288, in save
    models.Model.save_base(self.object, using=using, raw=True, **kwargs)
  File "D:\tmp\od\venv\lib\site-packages\django\db\models\base.py", line 877, in save_base
    updated = self._save_table(
  File "D:\tmp\od\venv\lib\site-packages\django\db\models\base.py", line 1020, in _save_table
    results = self._do_insert(
  File "D:\tmp\od\venv\lib\site-packages\django\db\models\base.py", line 1061, in _do_insert
    return manager._insert(
  File "D:\tmp\od\venv\lib\site-packages\django\db\models\manager.py", line 87, in manager_method
    return getattr(self.get_queryset(), name)(*args, **kwargs)
  File "D:\tmp\od\venv\lib\site-packages\django\db\models\query.py", line 1805, in _insert
    return query.get_compiler(using=using).execute_sql(returning_fields)
  File "D:\tmp\od\venv\lib\site-packages\django\db\models\sql\compiler.py", line 1822, in execute_sql
    cursor.execute(sql, params)
  File "D:\tmp\od\venv\lib\site-packages\django\db\backends\utils.py", line 102, in execute
    return super().execute(sql, params)
  File "D:\tmp\od\venv\lib\site-packages\django\db\backends\utils.py", line 67, in execute
    return self._execute_with_wrappers(
  File "D:\tmp\od\venv\lib\site-packages\django\db\backends\utils.py", line 80, in _execute_with_wrappers
    return executor(sql, params, many, context)
  File "D:\tmp\od\venv\lib\site-packages\django\db\backends\utils.py", line 84, in _execute
    with self.db.wrap_database_errors:
  File "D:\tmp\od\venv\lib\site-packages\django\db\utils.py", line 91, in __exit__
    raise dj_exc_value.with_traceback(traceback) from exc_value
  File "D:\tmp\od\venv\lib\site-packages\django\db\backends\utils.py", line 89, in _execute
    return self.cursor.execute(sql, params)
  File "D:\tmp\od\venv\lib\site-packages\django\db\backends\mysql\base.py", line 75, in execute
    return self.cursor.execute(query, args)
  File "D:\tmp\od\venv\lib\site-packages\pymysql\cursors.py", line 153, in execute
    result = self._query(query)
  File "D:\tmp\od\venv\lib\site-packages\pymysql\cursors.py", line 322, in _query
    conn.query(q)
  File "D:\tmp\od\venv\lib\site-packages\pymysql\connections.py", line 558, in query
    self._affected_rows = self._read_query_result(unbuffered=unbuffered)
  File "D:\tmp\od\venv\lib\site-packages\pymysql\connections.py", line 822, in _read_query_result
    result.read()
  File "D:\tmp\od\venv\lib\site-packages\pymysql\connections.py", line 1200, in read
    first_packet = self.connection._read_packet()
  File "D:\tmp\od\venv\lib\site-packages\pymysql\connections.py", line 772, in _read_packet
    packet.raise_for_error()
  File "D:\tmp\od\venv\lib\site-packages\pymysql\protocol.py", line 221, in raise_for_error
    err.raise_mysql_exception(self._data)
  File "D:\tmp\od\venv\lib\site-packages\pymysql\err.py", line 143, in raise_mysql_exception
    raise errorclass(errno, errval)
django.db.utils.IntegrityError: Problem installing fixture 'D:\tmp\od\day13\data.json': Could not load www.Administrator(pk=1): (1048, "Column 'create_date' cannot be null")
2
3
4
5
6
7
8
9
10
11
12
13
14
15
16
17
18
19
20
21
22
23
24
25
26
27
28
29
30
31
32
33
34
35
36
37
38
39
40
41
42
43
44
45
46
47
48
49
50
51
52
53
54
55
56
57
58
59
60
61
62
63
64
65
66
67
68
69
70
71
72
73
74
75
76
77
78
79
80
81
82
83
84
85
86
87
88
89
90
91
92
问题原因,是Administrator模型类中,对于create_date的约束没写全。
class Administrator(ActiveBaseModel):
    """ 管理员表 """
    username = models.CharField(verbose_name="用户名", max_length=32, db_index=True)
    password = models.CharField(verbose_name="密码", max_length=64)
    mobile = models.CharField(verbose_name="手机号", max_length=11, db_index=True)
    # create_date = models.DateTimeField(verbose_name="创建日期", auto_now_add=True)
    create_date = models.DateTimeField(verbose_name="创建日期", auto_now_add=True, null=True, blank=True)  # 添加null=True, blank=True

    def __str__(self):
        return self.username
2
3
4
5
6
7
8
9
10
11
然后从新执行:
python manage.py makemigrations
python manage.py migrate
python manage.py loaddata data.json
2
3
# 本地操作:从MySQL中备份数据库
有兴趣可以参考:https://www.cnblogs.com/Neeo/articles/11303149.html#普通参数 (opens new window)
mysqldump -uroot -p --default-character-set=utf8 -B 要备份的数据库 >要保存的数据文件名.sql

# 我的项目用到的数据库是day13,所以,我只需要将这一个数据库备份出来即可。
mysqldump -uroot -p --default-character-set=utf8 -B day13 >data.sql
2
3
4
备份数据,我不推荐用navicat,因为sql不全,推荐mysqldump命令。
# Redis配置
参考:https://www.cnblogs.com/Neeo/articles/14269422.html (opens new window)
在local_settings.py:
CACHES = {
    "default": {
        "BACKEND": "django_redis.cache.RedisCache",
        "LOCATION": "redis://127.0.0.1:6379",  # 安装redis的主机的 IP 和 端口
        "OPTIONS": {
            "CLIENT_CLASS": "django_redis.client.DefaultClient",
            "CONNECTION_POOL_KWARGS": {
                "max_connections": 1000,
                "encoding": 'utf-8'
            },
            "PASSWORD": "123456"  # redis密码
        }
    }
}
2
3
4
5
6
7
8
9
10
11
12
13
14
本地测下Redis是否好用。
account.py:
from django.conf import settings
from django.shortcuts import render, redirect
from django.http import JsonResponse
from django.views.decorators.csrf import csrf_exempt
from www.forms.account import LoginForm, SmsLoginForm, SendSmsForm
from www import models
from django.shortcuts import HttpResponse

from django_redis import get_redis_connection


def login(request):
    # -------------- 新增的代码 -------------------
    conn = get_redis_connection('default')  # 或者显示的使用某个别名

    # 最基本的用法,获取连接对象,并设置值,同时指定过期时间,单位: 秒
    conn.set('18211101111', '8842', ex=10)
    # 在需要的地方在通过连接对象获取值
    print(conn.get("18211101111"))
 	# -------------- 新增的代码 -------------------

    # 1.GET请求看到登录页面
    if request.method == "GET":
        form = LoginForm()
        return render(request, "login.html", {"form": form})

    # 2.用户提交
    # 2.1 是否为空
    form = LoginForm(data=request.POST)
    if not form.is_valid():
        return render(request, "login.html", {"form": form})

    # 2.2 去数据库校验:客户表?管理员表?
    data_dict = form.cleaned_data  # {role:1,username:11,passwrod:123}
    role = data_dict.pop("role")
    if role == "1":
        user_object = models.Administrator.objects.filter(**data_dict).filter(active=1).first()
    else:
        user_object = models.Customer.objects.filter(**data_dict).filter(active=1).first()

    # 2.3 数据不存在
    if not user_object:
        form.add_error("password", "用户名或密码错误")
        return render(request, "login.html", {"form": form})

    # 2.4 数据存在,将用户信息存储session
    mapping = {"1": "ADMIN", "2": "CUSTOMER"}
    request.session[settings.NB_SESSION_KEY] = {
        "role": mapping[role],  # "ADMIN"  "CUSTOMER"
        "id": user_object.id,
        "name": user_object.username,
    }

    # 2.5 成功,跳转后台
    return redirect(settings.HOME_URL)
2
3
4
5
6
7
8
9
10
11
12
13
14
15
16
17
18
19
20
21
22
23
24
25
26
27
28
29
30
31
32
33
34
35
36
37
38
39
40
41
42
43
44
45
46
47
48
49
50
51
52
53
54
55
56
浏览器访问login页面,后端打印出来验证码就说明Redis没有问题。
# 最终调整
更新requirements.txt文件,项目根目录终端执行命令:
pip freeze > requirements.txt
这样,本地的项目就这样了。
# 线上环境准备
# 云服务器准备
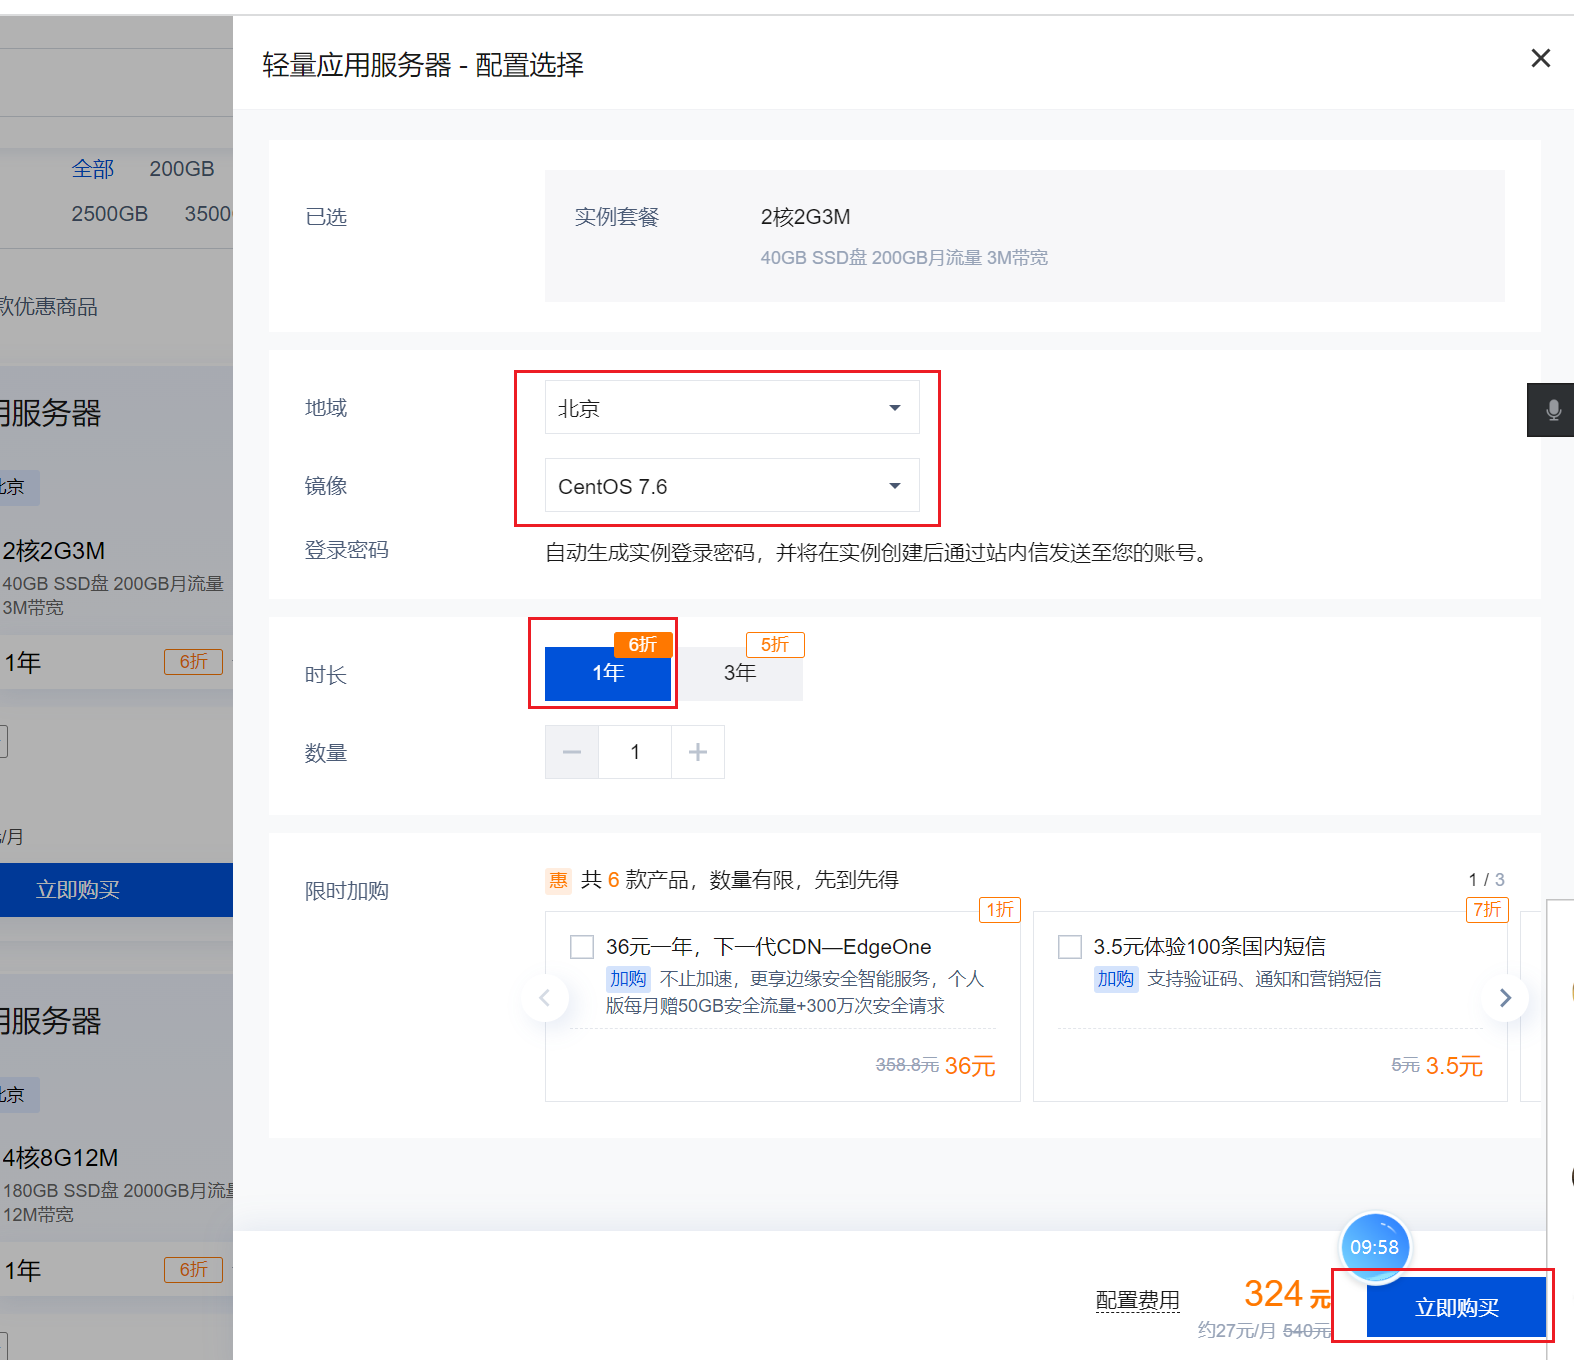
硬件要求:一个云服务器,配置要求:2核2G内存,带宽,阿里1M;腾讯300M/400M都行;硬盘40G+;系统是cnetos7.x(7.3/7.5/7.6)。
选择阿里、华为、腾讯、都可以。我这里以腾讯云为例,演示线上部署。
https://cloud.tencent.com/act
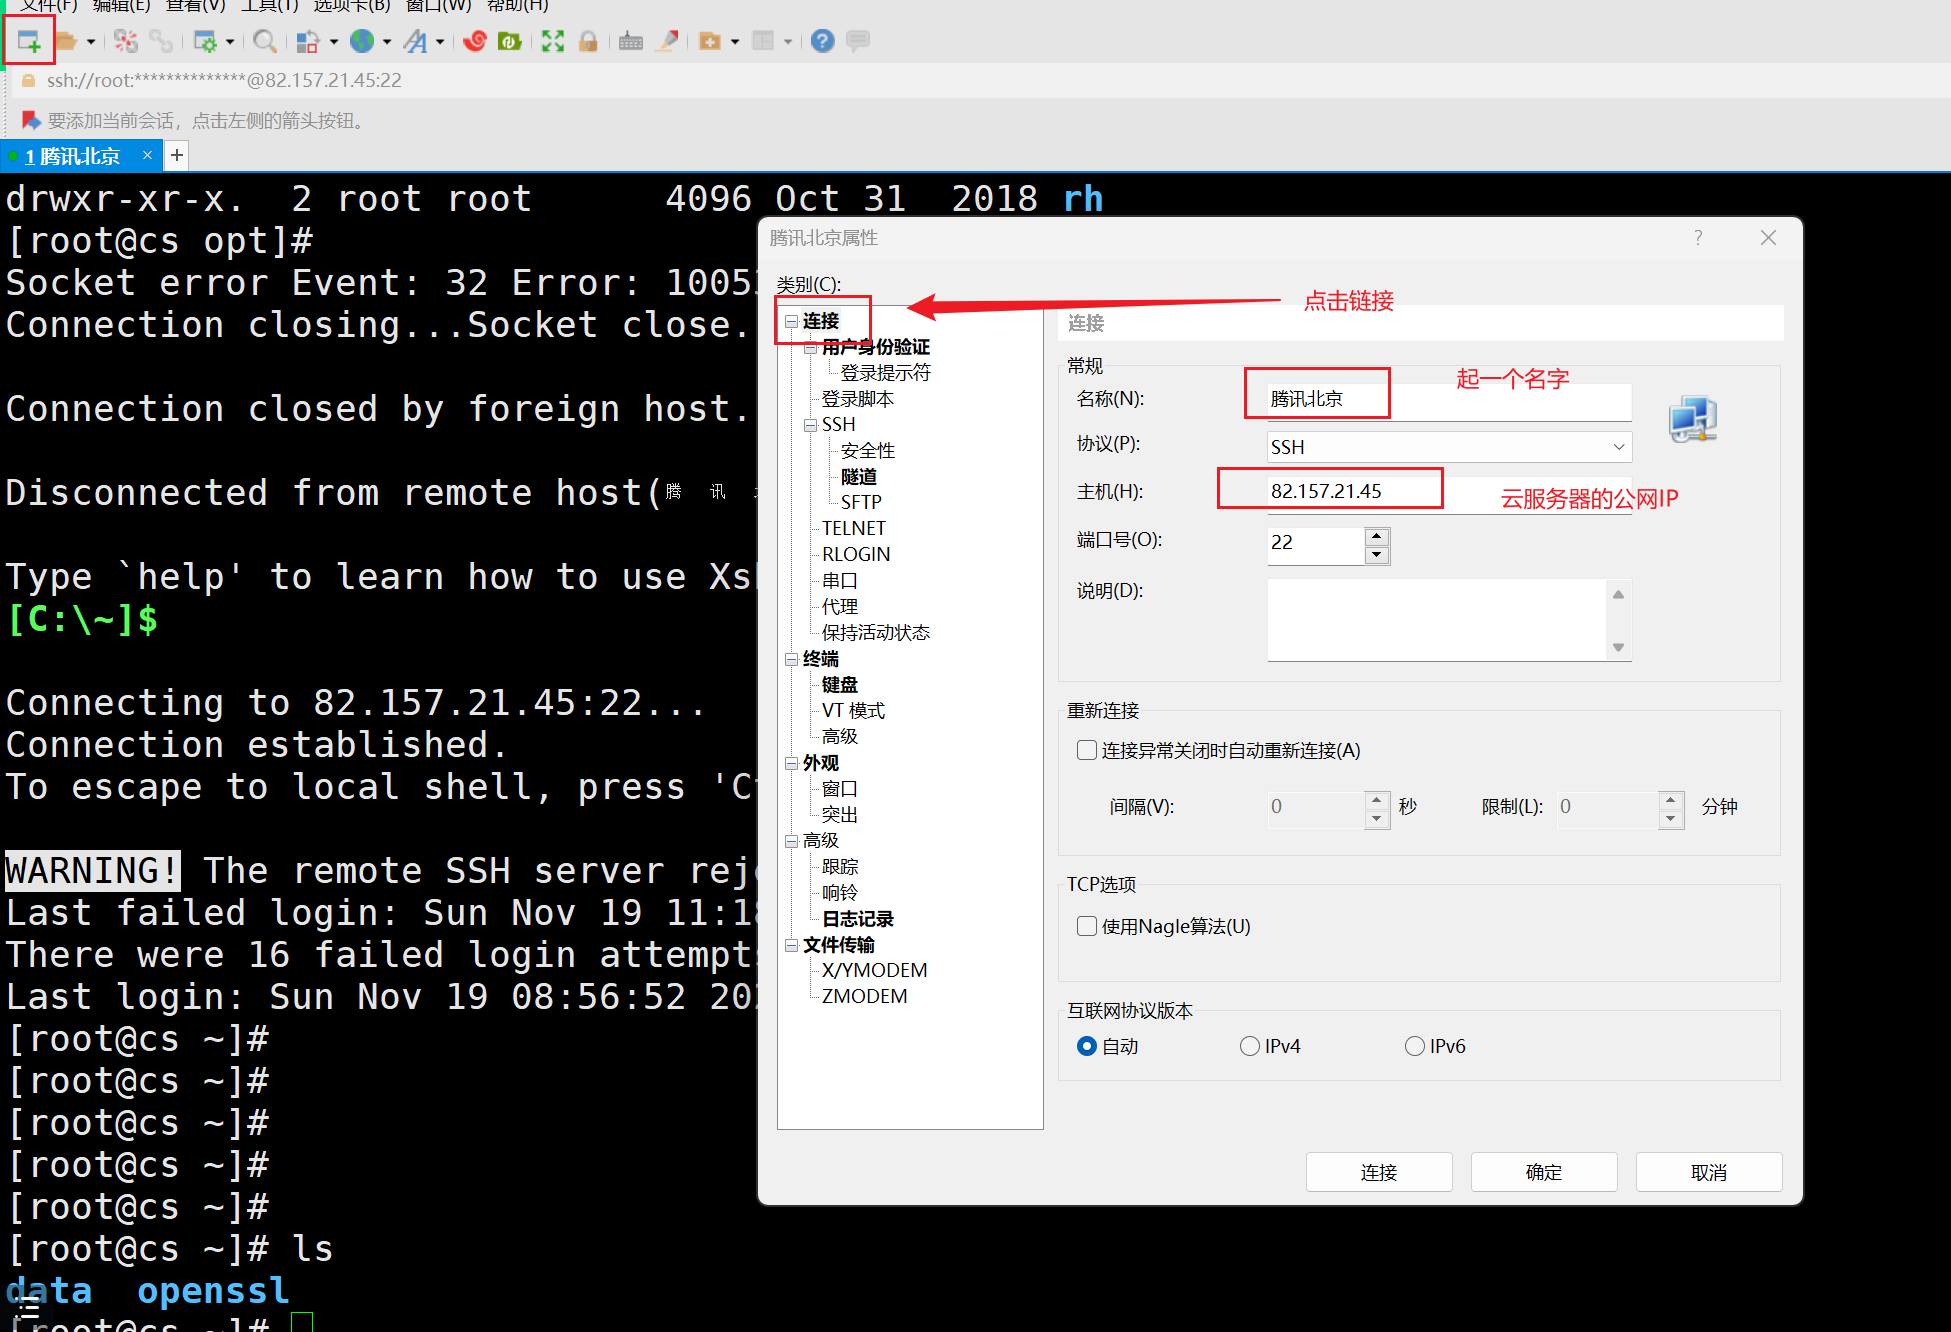
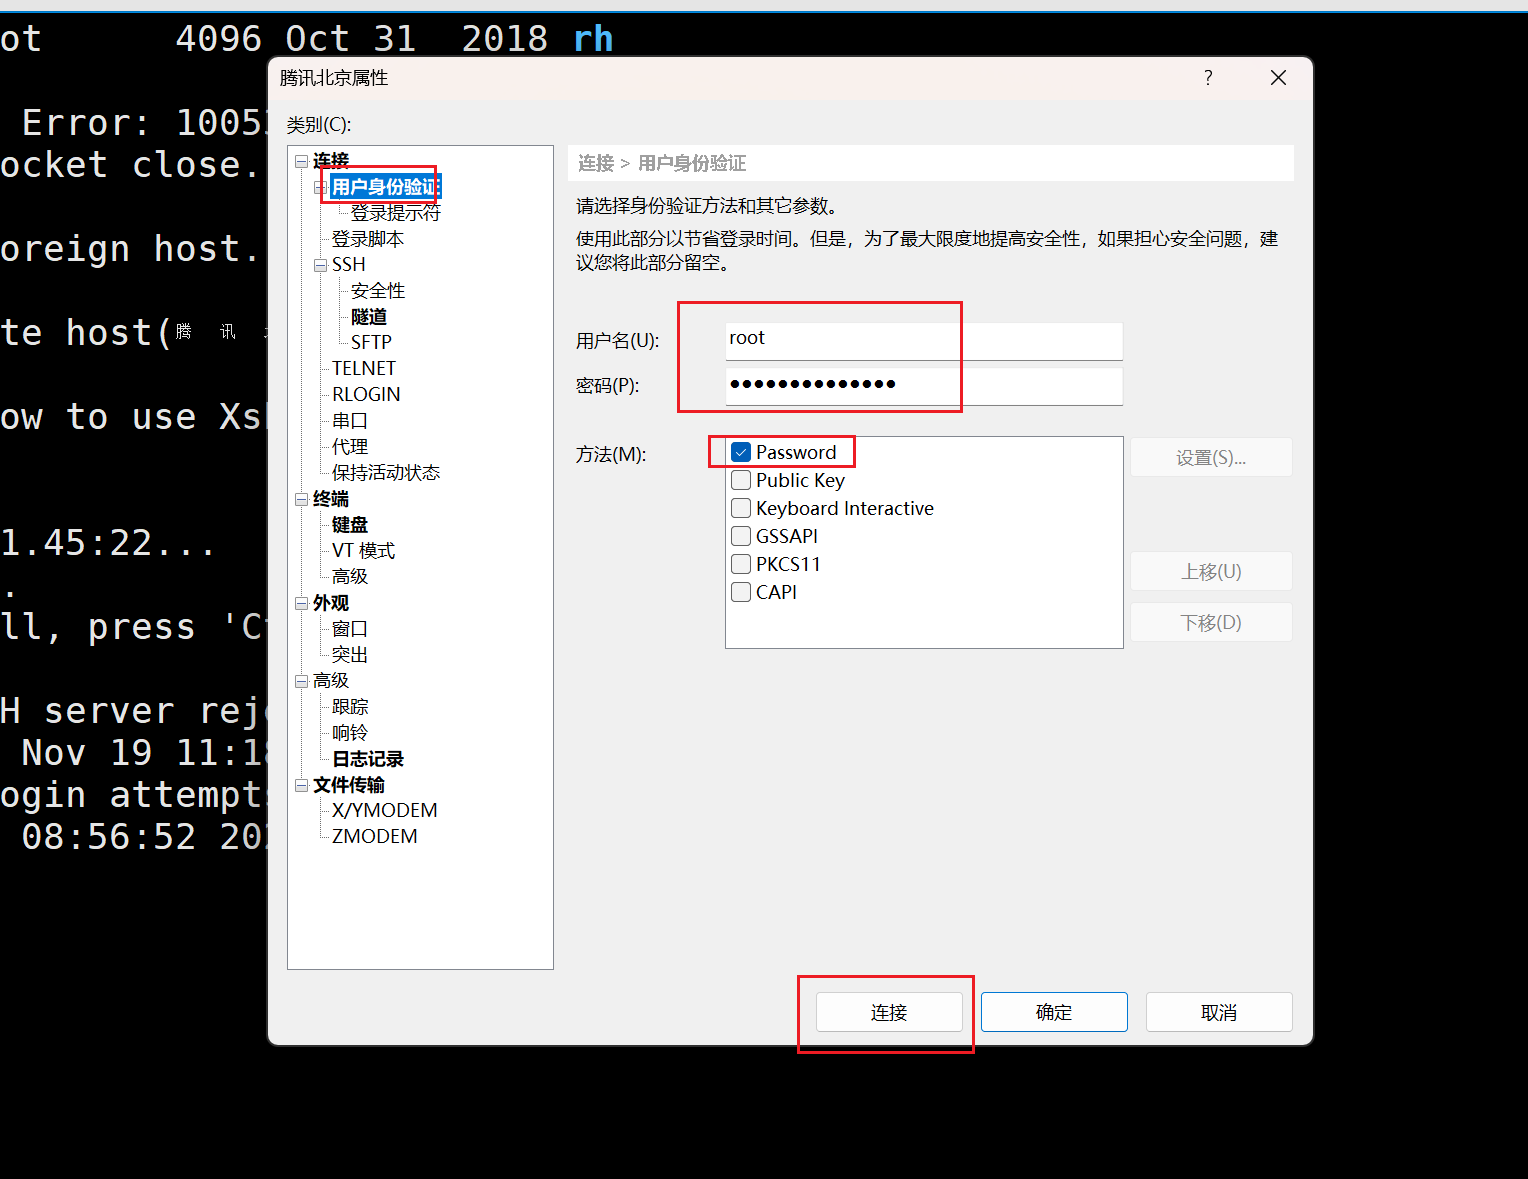
创建远程root账号的密码:
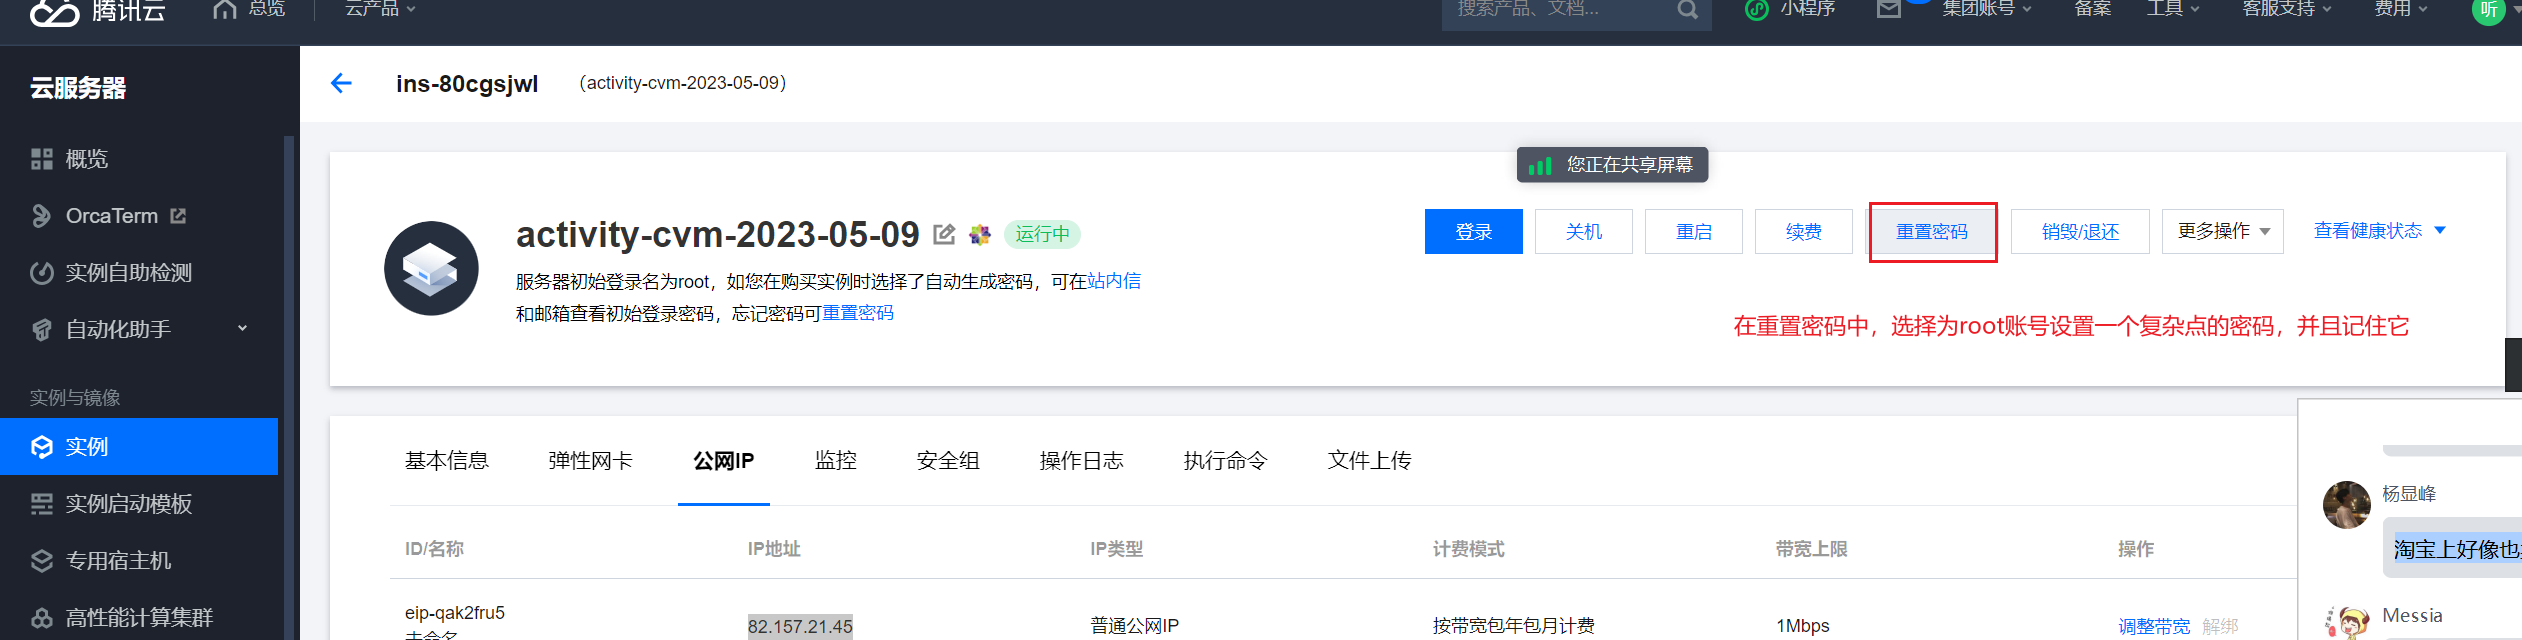
通过xshell连接,下载:https://www.xshell.com/zh/xshell/
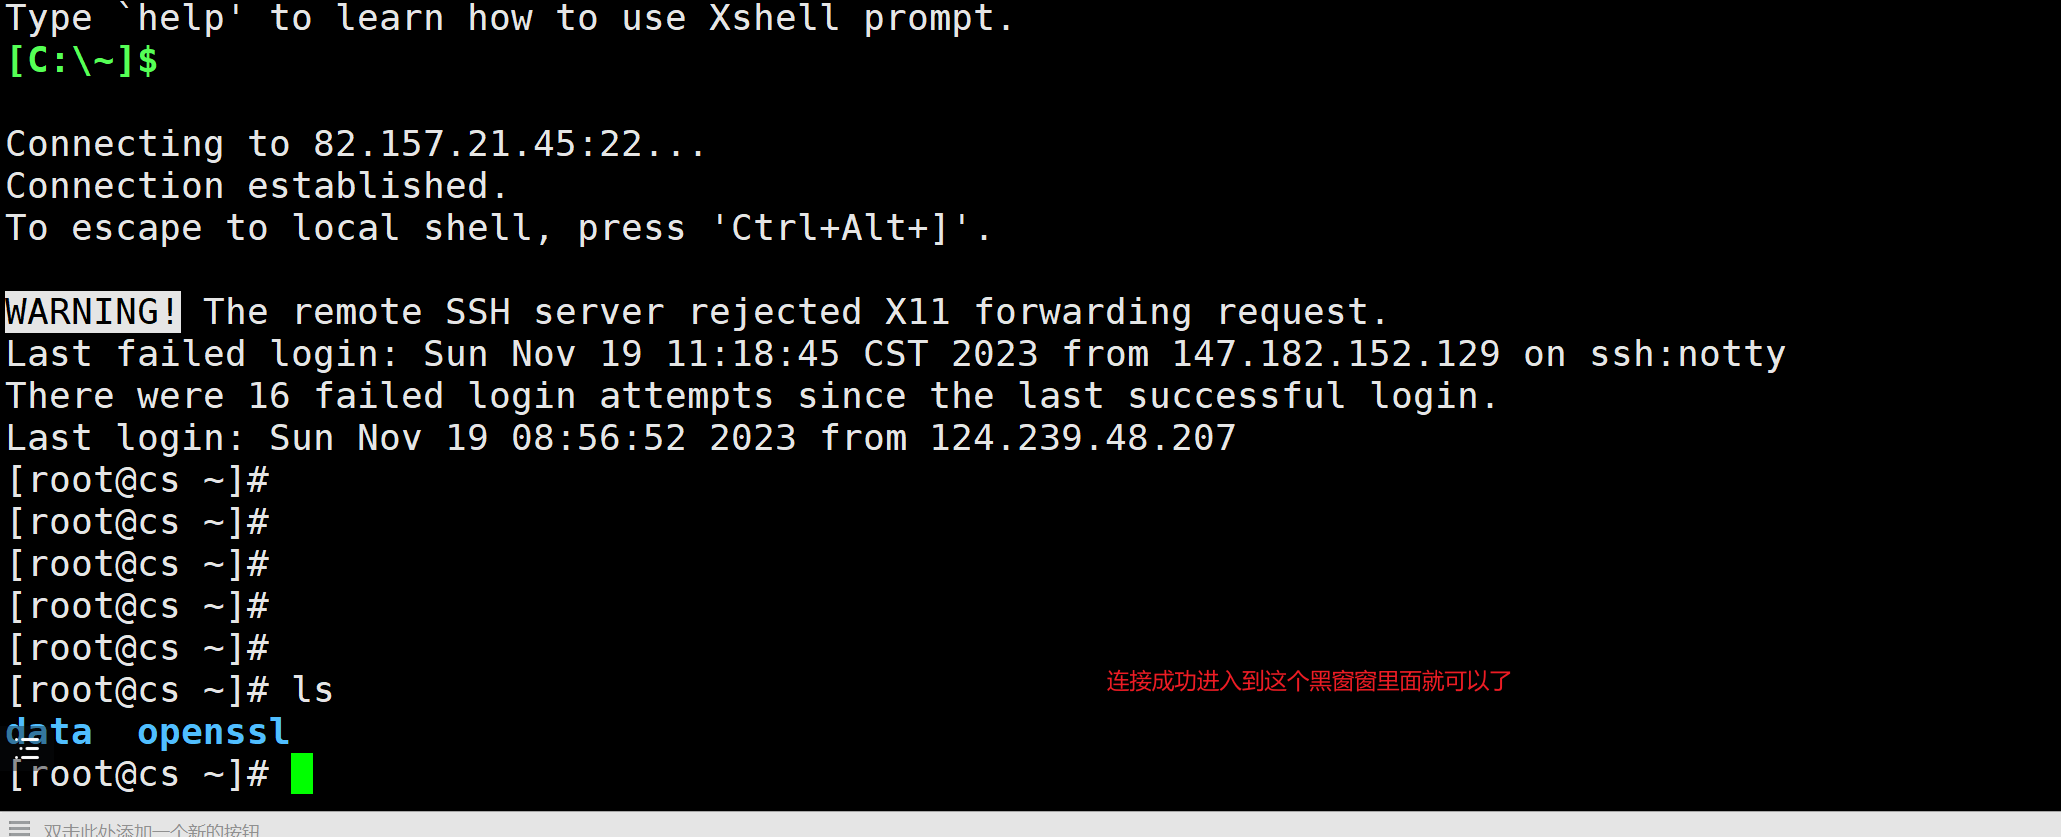
服务器有了,执行下面的命令:
# 查看防火墙状态
systemctl status firewalld.service
# 关闭防火墙
systemctl stop firewalld.service
# 禁止开机启动防火墙
systemctl disable firewalld.service
# 启动防火墙
systemctl start firewalld.service
# 防火墙随系统开启启动
systemctl enable firewalld.service
# 关闭selinux,提高了系统的安全性,但关闭它可以释放系统资源,提高服务器的性能,避免一些程序的兼容性问题等等
[root@r ~]# sed -i.ori 's#SELINUX=enforcing#SELINUX=disabled#g' /etc/selinux/config

systemctl stop firewalld.service
systemctl disable firewalld.service
systemctl status firewalld.service
sed -i.ori 's#SELINUX=enforcing#SELINUX=disabled#g' /etc/selinux/config
yum update -y
yum -y install gcc automake autoconf libtool make
yum -y install net-tools
yum -y install vim
yum -y install wget
yum install lrzsz
2
3
4
5
6
7
8
9
10
11
12
13
14
15
16
17
18
19
20
21
22
23
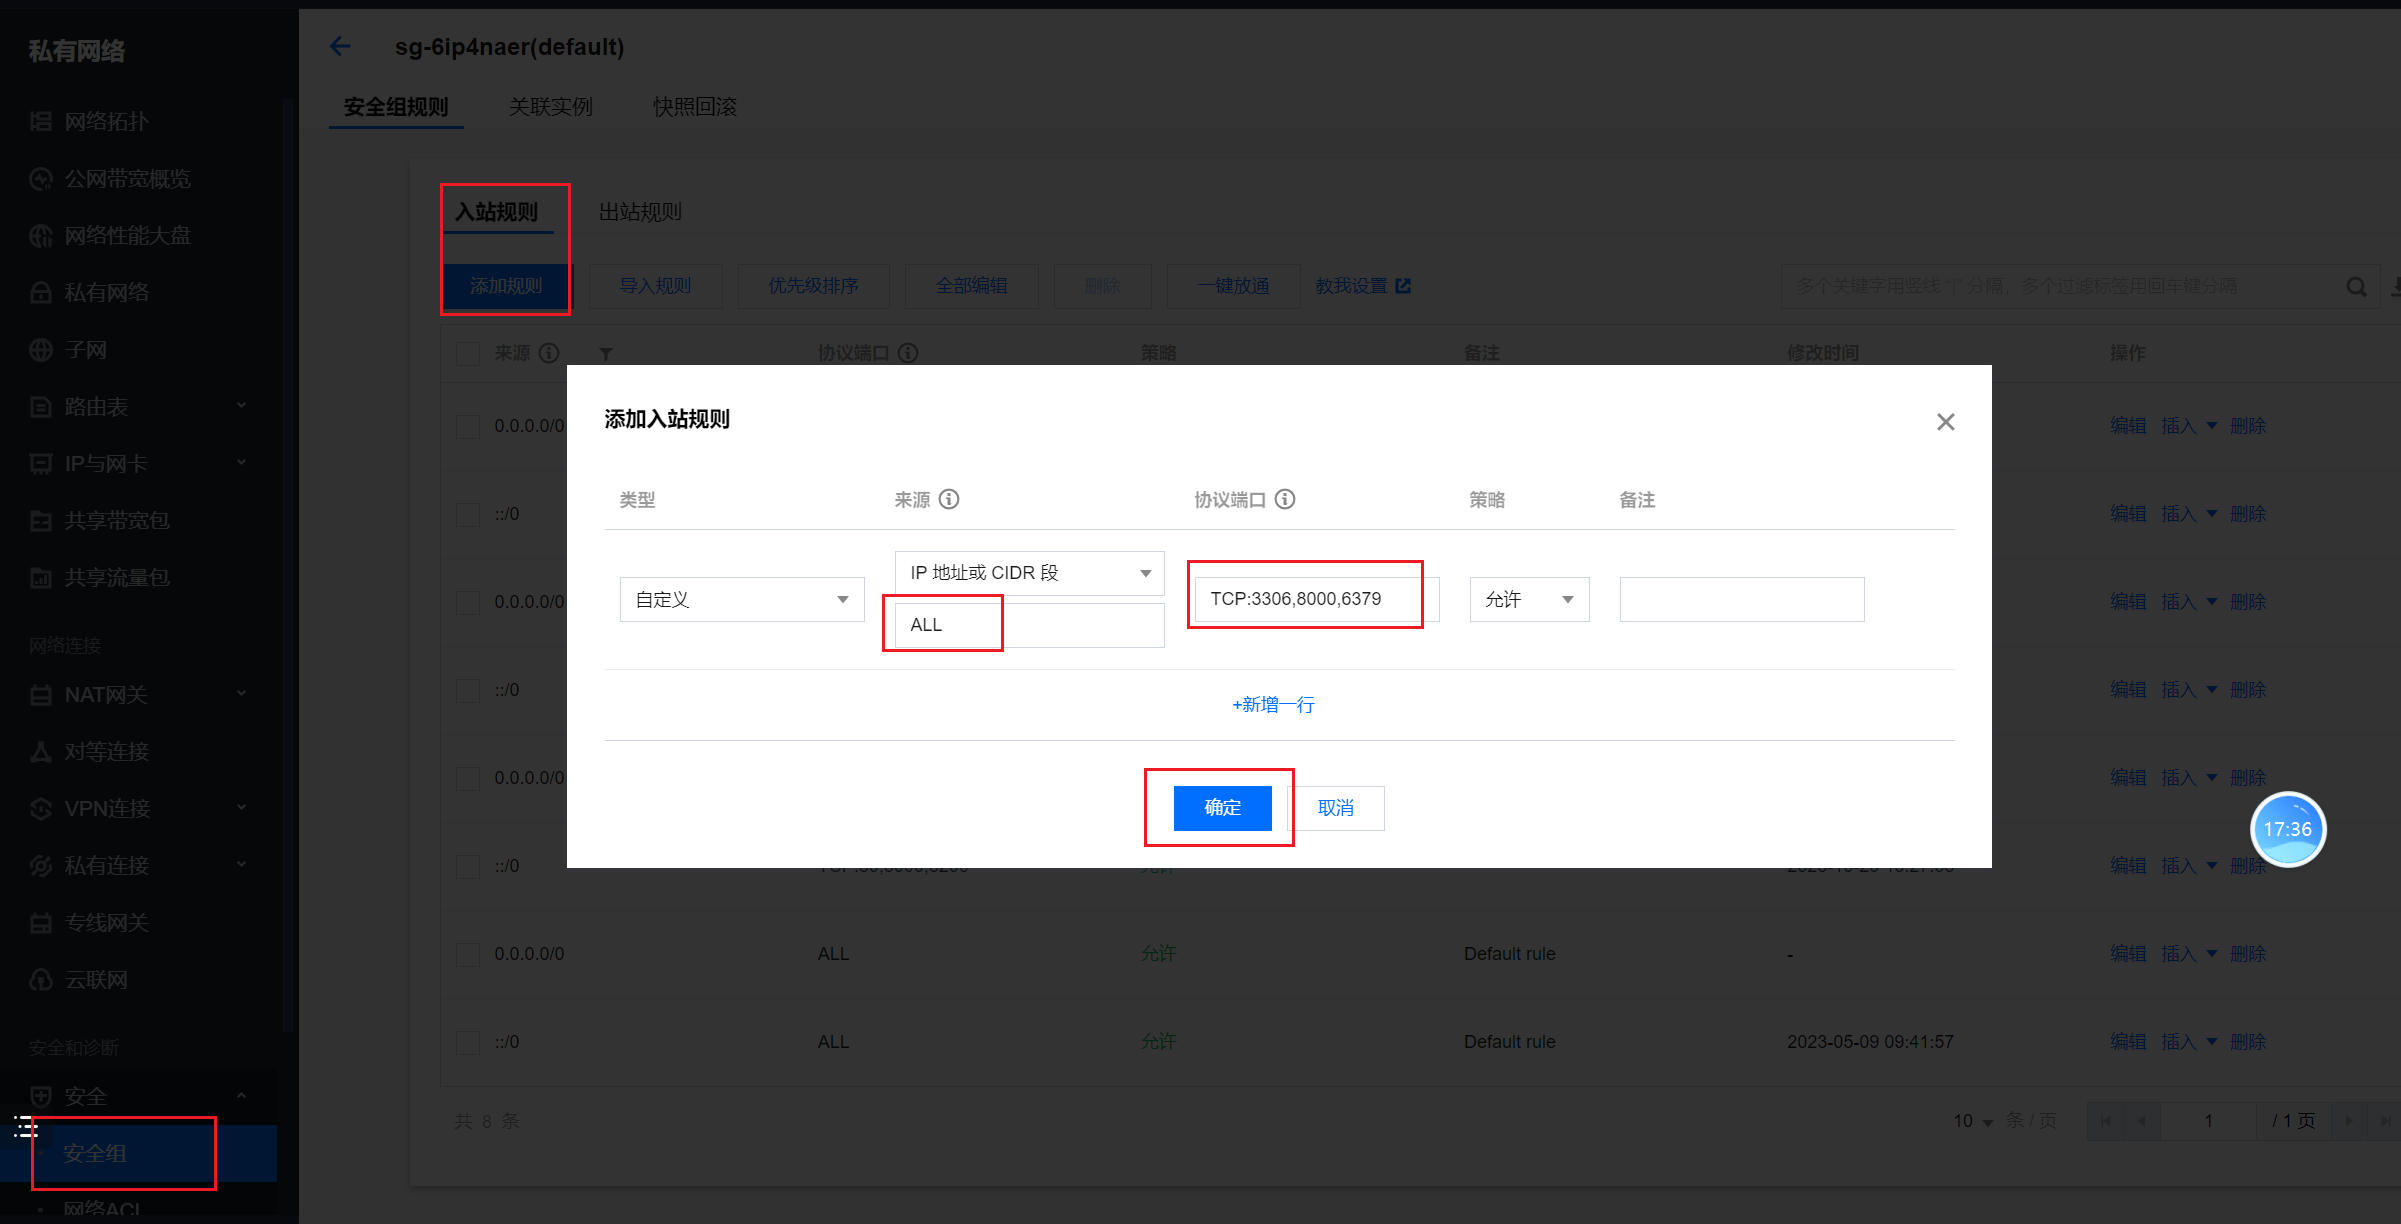
# 放开云服务器的安全组
# 线上:Python3.9.9解释器安装
Python3.6/Python3.11参考:https://www.cnblogs.com/Neeo/articles/12829625.html#%E7%BC%96%E8%AF%91%E5%AE%89%E8%A3%85python36
演示cenots7中安装Python3.9,参考:https://www.cnblogs.com/Neeo/articles/12829625.html#%E7%BC%96%E8%AF%91%E5%AE%89%E8%A3%85python311
yum install -y epel-release
yum update -y
yum install gcc patch libffi-devel python-devel  zlib-devel bzip2-devel openssl-devel ncurses-devel sqlite-devel readline-devel tk-devel gdbm-devel db4-devel libpcap-devel xz-devel -y

yum install lrzsz
cd /opt/
wget https://cdn.npmmirror.com/binaries/python/3.9.9/Python-3.9.9.tgz
tar -zxvf Python-3.9.9.tgz
cd /opt/Python-3.9.9
./configure --prefix=/opt/python399/  && make && make install
2
3
4
5
6
7
8
9
10
配置环境变量:
echo "export PATH=/opt/python399/bin:$PATH" >> /etc/profile
cat /etc/profile
source /etc/profile

# 添加软连接
ln -s /opt/python399/bin/python3.9 /usr/bin/python3.9
ln -s /opt/python399/bin/pip3.9 /usr/bin/pip3.9
2
3
4
5
6
7
任意路径测试:
[root@cs opt]# python3.9 -V
Python 3.9.9
[root@cs opt]# pip3.9 -V
pip 21.2.4 from /opt/python399/lib/python3.9/site-packages/pip (python 3.9)
2
3
4
# MySQL8.0安装
https://www.cnblogs.com/Neeo/articles/17135006.html#for-centos7x
把本地的初始sql文件,导入到线上MySQL中:
# 云服务器中执行
# 首先把本地项目根目录下data.sql文件手动上传到云服务器
cd /opt/
mysql -uroot -p123 <data.sql
2
3
4
# 线上:nginx安装
代理服务器:
下载依赖
yum update -y
yum -y install gcc gcc-c++ pcre pcre-devel  zlib zlib-devel openssl openssl-devel libxml2-devel libxslt-devel gd-devel GeoIP-devel jemalloc-devel libatomic_ops-devel perl-devel  perl-ExtUtils-Embed

#安装Nginx需要先将官网下载的源码进行编译,依赖gcc环境

#PCRE是一个perl库,包括perl兼容的正则表达式库。Nginx的http模块使用pcre库来解析正则表达式

#zlib库提供很多种压缩解压缩方式,Nginx使用zlib对http包的内容进行gzip

#OpenSSL是一个强大的安全套接字层密码库,囊括主要的密码算法、常用的秘钥和证书封装管理功能及
SSL协议,并提供丰富的应用程序供测试或其它目的使用。Nginx不仅支持http协议,还支持HTTPS协议
(即在SSL协议上传输http)。
2
3
4
5
6
7
8
9
10
11
12
下载
去这个链接:https://nginx.org/en/download.html (opens new window)
cd /opt
wget https://nginx.org/download/nginx-1.24.0.tar.gz
ls

[root@cs opt]# ls
nginx-1.24.0.tar.gz
2
3
4
5
6
解压
cd /opt
tar -zxvf nginx-1.24.0.tar.gz
2
编译安装,我按照方式3走的
注意:nginx的解压目录和编译目录不能是同一文件夹。
方式1:一切都安装默认安装:
cd /opt/nginx-1.24.0
./configure && make && make install

# 这种方式nginx的安装目录为/usr/local/nginx
2
3
4
方式2:按照默认编译,并且指定安装目录:
cd /opt
mkdir my_nginx
cd /opt/nginx-1.24.0
./configure --prefix=/opt/my_nginx
2
3
4
方式3:编译所有的功能模块,并且指定安装目录:
cd /opt
mkdir my_nginx
cd /opt/nginx-1.24.0
./configure --prefix=/opt/my_nginx \
    --with-threads \
    --with-file-aio \
    --with-http_ssl_module \
    --with-http_v2_module \
    --with-http_realip_module \
    --with-http_addition_module \
    --with-http_xslt_module=dynamic \
    --with-http_image_filter_module=dynamic \
    --with-http_geoip_module=dynamic \
    --with-http_sub_module \
    --with-http_dav_module \
    --with-http_flv_module \
    --with-http_mp4_module \
    --with-http_gunzip_module \
    --with-http_gzip_static_module \
    --with-http_auth_request_module \
    --with-http_random_index_module \
    --with-http_secure_link_module \
    --with-http_degradation_module \
    --with-http_slice_module \
    --with-http_stub_status_module \
    --with-stream=dynamic \
    --with-stream_ssl_module \
    --with-stream_realip_module \
    --with-stream_geoip_module=dynamic \
    --with-stream_ssl_preread_module \
    --with-compat  \
    --with-pcre-jit
2
3
4
5
6
7
8
9
10
11
12
13
14
15
16
17
18
19
20
21
22
23
24
25
26
27
28
29
30
31
32
没有报错的情况:
Configuration summary
  + using threads
  + using system PCRE library
  + using system OpenSSL library
  + using system zlib library

  nginx path prefix: "/opt/my_nginx"
  nginx binary file: "/opt/my_nginx/sbin/nginx"
  nginx modules path: "/opt/my_nginx/modules"
  nginx configuration prefix: "/opt/my_nginx/conf"
  nginx configuration file: "/opt/my_nginx/conf/nginx.conf"
  nginx pid file: "/opt/my_nginx/logs/nginx.pid"
  nginx error log file: "/opt/my_nginx/logs/error.log"
  nginx http access log file: "/opt/my_nginx/logs/access.log"
  nginx http client request body temporary files: "client_body_temp"
  nginx http proxy temporary files: "proxy_temp"
  nginx http fastcgi temporary files: "fastcgi_temp"
  nginx http uwsgi temporary files: "uwsgi_temp"
  nginx http scgi temporary files: "scgi_temp"
2
3
4
5
6
7
8
9
10
11
12
13
14
15
16
17
18
19
接下来进行编译安装:
make -j$(nproc) && make install -j$(nproc)
看下安装目录:
cd /opt/my_nginx
ls

[root@cs my_nginx]# ls
client_body_temp  fastcgi_temp  logs     proxy_temp  scgi_temp
conf              html          modules  sbin        uwsgi_temp
2
3
4
5
6
在nginx的安装目录中:
- conf:存放nginx配置文件目录
- logs:存放nginx日志目录
- sbin:存放nginx可执行脚本目录
- html:存放nginx的网站站点,静态资源的目录
知道主要的目录作用,我们也就可以启动nginx了。
cd /opt/my_nginx/sbin
./nginx
ps -ef|grep nginx

[root@cs sbin]# ps -ef|grep nginx
root      39441      1  0 22:37 ?        00:00:00 nginx: master process ./nginx
nobody    39442  39441  0 22:37 ?        00:00:00 nginx: worker process
root      39444  73894  0 22:37 pts/1    00:00:00 grep --color=auto nginx
2
3
4
5
6
7
8
浏览器直接访问你的ip地址就可以看到了:
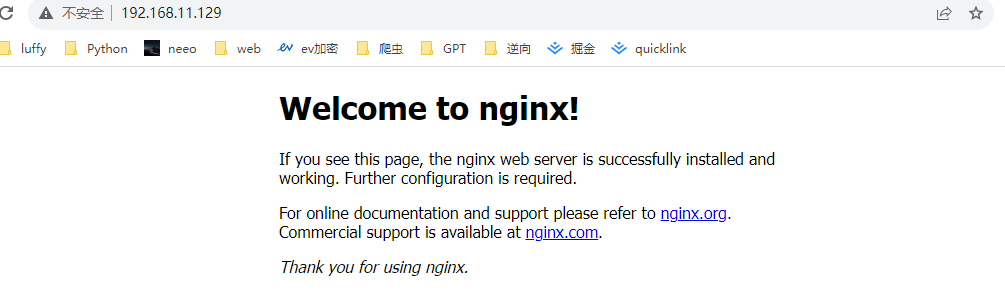
如果想要在任意目录输入nginx即可启动,那还需要配置nginx的环境变量。
配置nginx环境变量
echo "export PATH=/opt/my_nginx/sbin:\$PATH" >> /etc/profile
source /etc/profile
2
此时,就可以在任意位置启动nginx了。
配置启动方式
直接nginx命令启动
# 直接输入nginx来启动,但只能首次启动nginx使用,因为重复启动的话,会提示80端口已被占用
nginx

# 查看nginx相关进程
ps -ef | grep nginx

# 查看NGINX监听的端口
netstat -tunlp | grep nginx

# 平滑重启nginx,也就是重新读取nginx的配置文件,而不是重启进程
nginx -s reload

# 确认nginx配置文件是否争取的
nginx -t
# 停止nginx, 杀死nginx进程
nginx -s stop
2
3
4
5
6
7
8
9
10
11
12
13
14
15
16
配置systemctl管理nginx
systemd 配置文件说明:
- 每一个 Unit 都需要有一个配置文件用于告知 systemd 对于服务的管理方式
- 配置文件存放于 /usr/lib/systemd/system/,设置开机启动后会在 /etc/systemd/system 目录建立软链接文件
- 每个Unit的配置文件配置默认后缀名为.service
- 在 /usr/lib/systemd/system/ 目录中分为 system 和 user 两个目录,一般将开机不登陆就能运行的程序存在系统服务里,也就是 /usr/lib/systemd/system
- 配置文件使用方括号分成了多个部分,并且区分大小写
我们来配置下:
cat >/lib/systemd/system/nginx.service<<EOF
[Unit]
Description=nginx
After=network.target

[Service]
Type=forking
ExecStartPre=/opt/my_nginx/sbin/nginx -t -c /opt/my_nginx/conf/nginx.conf
ExecStart=/opt/my_nginx/sbin/nginx -c /opt/my_nginx/conf/nginx.conf
ExecReload=/opt/my_nginx/sbin/nginx -s reload
ExecStop=/opt/my_nginx/sbin/nginx -s stop
PrivateTmp=true
[Install]
WantedBy=multi-user.target
EOF
cat /lib/systemd/system/nginx.service
2
3
4
5
6
7
8
9
10
11
12
13
14
15
16
解释版:
cat >/lib/systemd/system/nginx.service<<EOF
[Unit]     # 记录service文件的通用信息
Description=nginx    # Nginx服务描述信息
After=network.target    # Nginx服务启动依赖,在指定服务之后启动
[Service]    # 记录service文件的service信息
Type=forking    # 标准UNIX Daemon使用的启动方式
ExecStartPre=/opt/my_nginx/sbin/nginx -t -c /opt/my_nginx/conf/nginx.conf
ExecStart=/opt/my_nginx/sbin/nginx -c /opt/my_nginx/conf/nginx.conf
ExecReload=/opt/my_nginx/sbin/nginx -s reload
ExecStop=/opt/my_nginx/sbin/nginx -s stop
PrivateTmp=true
[Install]    # 记录service文件的安装信息
WantedBy=multi-user.target    # 多用户环境下启用
EOF
cat /lib/systemd/system/nginx.service
2
3
4
5
6
7
8
9
10
11
12
13
14
15
然后执行如下命令:
pkill nginx
systemctl daemon-reload
systemctl start nginx
systemctl status nginx
systemctl stop nginx
2
3
4
5

# 线上:Redis安装
redis安装:https://www.cnblogs.com/Neeo/articles/17609004.html#redis507-for-centos79 (opens new window)
我的配置:
daemonize yes
# 注意,生产中, 千万不要bind 0.0.0.0,不要将Redis暴露到外网环境,防止被人攻击
bind 0.0.0.0
port 6379
pidfile /opt/redis6379/pid/redis6379.pid
logfile /opt/redis6379/logs/redis6379.log

requirepass 1234
2
3
4
5
6
7
8
# 线上部署步骤
# 目录规划
mkdir -p /od
cd /od
2
# 本地项目中配置文件修改为线上的配置并上传项目到云服务器
settings.py:
# ENVS_ = 'local'
# ENVS_ = 'test'
ENVS_ = 'pro'


try:
    if ENVS_ == 'local':
    # 放到最后,是为了将前面的覆盖吗
        from .local_settings import *
    elif ENVS_ == 'pro':
        from .pro_settings import *
except ImportError as e:
    print(f'------------> 项目导入{ENVS_}环境配置报错 <------------>', e)
2
3
4
5
6
7
8
9
10
11
12
13
14
pro_settings.py:
ALLOWED_HOSTS = ["*"]


# 静态文件收集目录
STATIC_ROOT = "/od/allstatic/"

# 先开着调试模式
DEBUG = True
# 云服务器中的MySQL配置
DATABASES = {
    'default': {
        'ENGINE': 'django.db.backends.mysql',
        'NAME': 'day13',    		#你的数据库名称
        'USER': 'zhangkai',   		#你的数据库用户名
        'PASSWORD': '123', 	#你的数据库密码
        'HOST': '82.157.21.45', 			#你的数据库主机,留空默认为localhost
        'PORT': '3306', 		#你的数据库端口
    }
}

CACHES = {
    "default": {
        "BACKEND": "django_redis.cache.RedisCache",
        "LOCATION": "redis://82.157.21.45:6379",  # 安装redis的主机的 IP 和 端口
        "OPTIONS": {
            "CLIENT_CLASS": "django_redis.client.DefaultClient",
            "CONNECTION_POOL_KWARGS": {
                "max_connections": 1000,
                "encoding": 'utf-8'
            },
            "PASSWORD": "1234"  # redis密码
        }
    }
}
2
3
4
5
6
7
8
9
10
11
12
13
14
15
16
17
18
19
20
21
22
23
24
25
26
27
28
29
30
31
32
33
34
手动将项目打包,并且上传到云服务器的/od目录下:
cd /od
unzip day13.zip

[root@cs od]# ls
day13    # 项目目录
day13.zip
2
3
4
5
6
# 创建虚拟环境
下载依赖包:
cd /od
pip3 install virtualenv

virtualenv venv
source /od/venv/bin/activate
pip -V
pip install --upgrade pip
pip install uwsgi
pip install -r day13/requirements.txt
2
3
4
5
6
7
8
9
cd /od/day13/
python manage.py runserver 0.0.0.0:8000
2
# 数据库迁移
在线上操作
之前的步骤做完:
# 云服务器中执行
cd到data.sql文件所在的目录,执行下面的命令
mysql -uroot -p123 <data.sql
2
3
# 测试项目能否运行(重要的一步)
云服务器操作
激活虚拟环境之后,通过下面的命令运行Django项目:
cd /od
source /od/venv/bin/activate
pip install -r day13/requirements.txt
cd day13
python3 manage.py  runserver 0.0.0.0:8000
2
3
4
5
# 配置uwsgi
创建uwsig.ini文件:
cd /od
mkdir script
mkdir logs
vim script/uwsgi.ini
2
3
4
文件内容:
[uwsgi]

# 填写订单项目的根目录
chdir=/od/day13/

# 填写与项目同名的目录,这是个相对路径,主要就是找到其内的wsgi.py这个文件
module=day13.wsgi

# 虚拟环境的根目录,也就是工作目录
home=/od/venv/

# uwsgi的主进程,其他的uwsgi的进程都是这个主进程的子进程,当你kill时,杀掉的也是这个master主进程
master=true

# uwsgi并发时的工作进程的数量,官网的建议是:2 * cup核数 + 1
# 由这几个进程来分摊并发请求
processes=3

# 临时使用http,实际部署时,通过nginx反向代理,就要把http换成socket,这点别忘了改
http=0.0.0.0:8000
# socket=0.0.0.0:8000

# 当服务器退出时,自动删除unix socket文件和pid文件
vacuum=true

# 默认的请求的大小为4096,如果你接收到了一个更大的请求 (例如,带有大cookies或者查询字符串),那么超过4096的限制就会报错invalid request block size: 4547 (max 4096)...skip,所以我们这里提前调整下
# https://uwsgi-docs-zh.readthedocs.io/zh_CN/latest/Options.html#buffer-size
buffer-size=32768

# uwsgi的日志文件
logto=/od/logs/uwsgi.log
2
3
4
5
6
7
8
9
10
11
12
13
14
15
16
17
18
19
20
21
22
23
24
25
26
27
28
29
30
31
将项目的线上配置pro_settings.py中的debug模式调整为Flase:
# -*- coding = utf-8 -*-

ALLOWED_HOSTS = ["*"]


DEBUG = False

# 云服务器中的MySQL配置
DATABASES = {
    'default': {
        'ENGINE': 'django.db.backends.mysql',
        'NAME': 'day13',    		#你的数据库名称
        'USER': 'zhangkai',   		#你的数据库用户名
        'PASSWORD': '123', 	#你的数据库密码
        'HOST': '82.157.21.45', 			#你的数据库主机,留空默认为localhost
        'PORT': '3306', 		#你的数据库端口
    }
}

CACHES = {
    "default": {
        "BACKEND": "django_redis.cache.RedisCache",
        "LOCATION": "redis://82.157.21.45:6379",  # 安装redis的主机的 IP 和 端口
        "OPTIONS": {
            "CLIENT_CLASS": "django_redis.client.DefaultClient",
            "CONNECTION_POOL_KWARGS": {
                "max_connections": 1000,
                "encoding": 'utf-8'
            },
            "PASSWORD": "1234"  # redis密码
        }
    }
}
2
3
4
5
6
7
8
9
10
11
12
13
14
15
16
17
18
19
20
21
22
23
24
25
26
27
28
29
30
31
32
33
34
运行uwsgi测试:
cd /od
/od/venv/bin/uwsgi --ini ./script/uwsgi.ini
2
把uwsig.ini文件的参数调整一下,这个参数取消注释socket=0.0.0.0:8000:
[uwsgi]

# 填写订单项目的根目录
chdir=/od/day13/

# 填写与项目同名的目录,这是个相对路径,主要就是找到其内的wsgi.py这个文件
module=day13.wsgi

# 虚拟环境的根目录,也就是工作目录
home=/od/venv/

# uwsgi的主进程,其他的uwsgi的进程都是这个主进程的子进程,当你kill时,杀掉的也是这个master主进程
master=true

# uwsgi并发时的工作进程的数量,官网的建议是:2 * cup核数 + 1
# 由这几个进程来分摊并发请求
processes=3

# 临时使用http,实际部署时,通过nginx反向代理,就要把http换成socket,这点别忘了改
# http=0.0.0.0:8000
socket=0.0.0.0:8000

# 当服务器退出时,自动删除unix socket文件和pid文件
vacuum=true

# 默认的请求的大小为4096,如果你接收到了一个更大的请求 (例如,带有大cookies或者查询字符串),那么超过4096的限制就会报错invalid request block size: 4547 (max 4096)...skip,所以我们这里提前调整下
# https://uwsgi-docs-zh.readthedocs.io/zh_CN/latest/Options.html#buffer-size
buffer-size=32768

# uwsgi的日志文件
logto=/od/logs/uwsgi.log
2
3
4
5
6
7
8
9
10
11
12
13
14
15
16
17
18
19
20
21
22
23
24
25
26
27
28
29
30
31
uwsgi相关命令:
# 相对路径启动,指定配置文件启动后端
uwsgi --ini ./uwsgi.ini    # 启动
    # 启动时会生成两个文件,分别为:
    # PID文件 标识这个程序所处的状态
    # SOCK文件  用来和其他程序通信的
uwsgi --stop uwsgi.pid    # 停止
uwsgi --reload uwsgi.ini   # 重置


# 绝对路径启动,就是要找到uwsgi的绝对路径和uwsig.ini的绝对路径
(crmenv) [root@cs crm]# which uwsgi
/opt/crm/crmenv/bin/uwsgi
# uwsig.ini的绝对路径是 /opt/crm/uwsgi.ini

# 所以,绝对路径启动就是下面的样子
/opt/crm/crmenv/bin/uwsgi --ini /opt/crm/uwsgi.ini

# 关闭uwsgi进程,一键杀死所有与uwsgi相关的进程
pkill -9 uwsgi

# 你也可以先过滤出来,在根据pid进行kill
ps -ef |grep uwsgi # 查看进程,找到pid
kill -9 170515 # 杀死对应进程,-9强制 170515=pid
2
3
4
5
6
7
8
9
10
11
12
13
14
15
16
17
18
19
20
21
22
23
# 静态文件收集
将项目的线上配置pro_settings.py中确认是否有如下参数:
STATIC_ROOT = "/od/allstatic/"
执行下面的命令:
cd /od
echo "yes"|python3 ./day13/manage.py collectstatic
2
# 配置nginx
编辑nginx配置文件:
vim /opt/my_nginx/conf/nginx.conf
文件内容:
#user  nobody;
worker_processes  1;

#error_log  logs/error.log;
#error_log  logs/error.log  notice;
#error_log  logs/error.log  info;

#pid        logs/nginx.pid;


events {
    worker_connections  1024;
}


http {
    include       mime.types;
    default_type  application/octet-stream;
    sendfile        on;
    keepalive_timeout  65;


    server {
        listen       80;
        server_name  localhost;
        charset utf-8;
        gzip on;
        gzip_static on;
        gzip_min_length 1k;
        gzip_vary on;
        gzip_proxied any;
        gzip_comp_level 9;
        gzip_buffers 4 16k;
        gzip_http_version 1.0;
        gzip_types text/plain text/css application/json application/javascript text/xml application/xml application/xml+rss text/javascript image/jpeg image/gif image/png image/svg+xml;
        # 所有访问80端口的请求,都转发给8000端口的服务器,即uwsgi服务
        location / {
            include uwsgi_params;
            uwsgi_pass 0.0.0.0:8000;
        }
        location /static {
            alias /od/allstatic/;
        }
    }

}
2
3
4
5
6
7
8
9
10
11
12
13
14
15
16
17
18
19
20
21
22
23
24
25
26
27
28
29
30
31
32
33
34
35
36
37
38
39
40
41
42
43
44
45
46
47
然后平滑重启nginx:
nginx -t
nginx -s reload
2
同时保证uwsgi在运行,然后你就可以浏览器访问了:
# ssl配置
腾讯云ssl配置参考:https://cloud.tencent.com/document/product/400/35244?from_cn_redirect=1 (opens new window)
# 域名备案和解析
网站部署,最好的是要有个备案好的域名,然后让其域名和你的云服务器进行域名解析,这样我们可以通过域名访问我们的云服务器了。
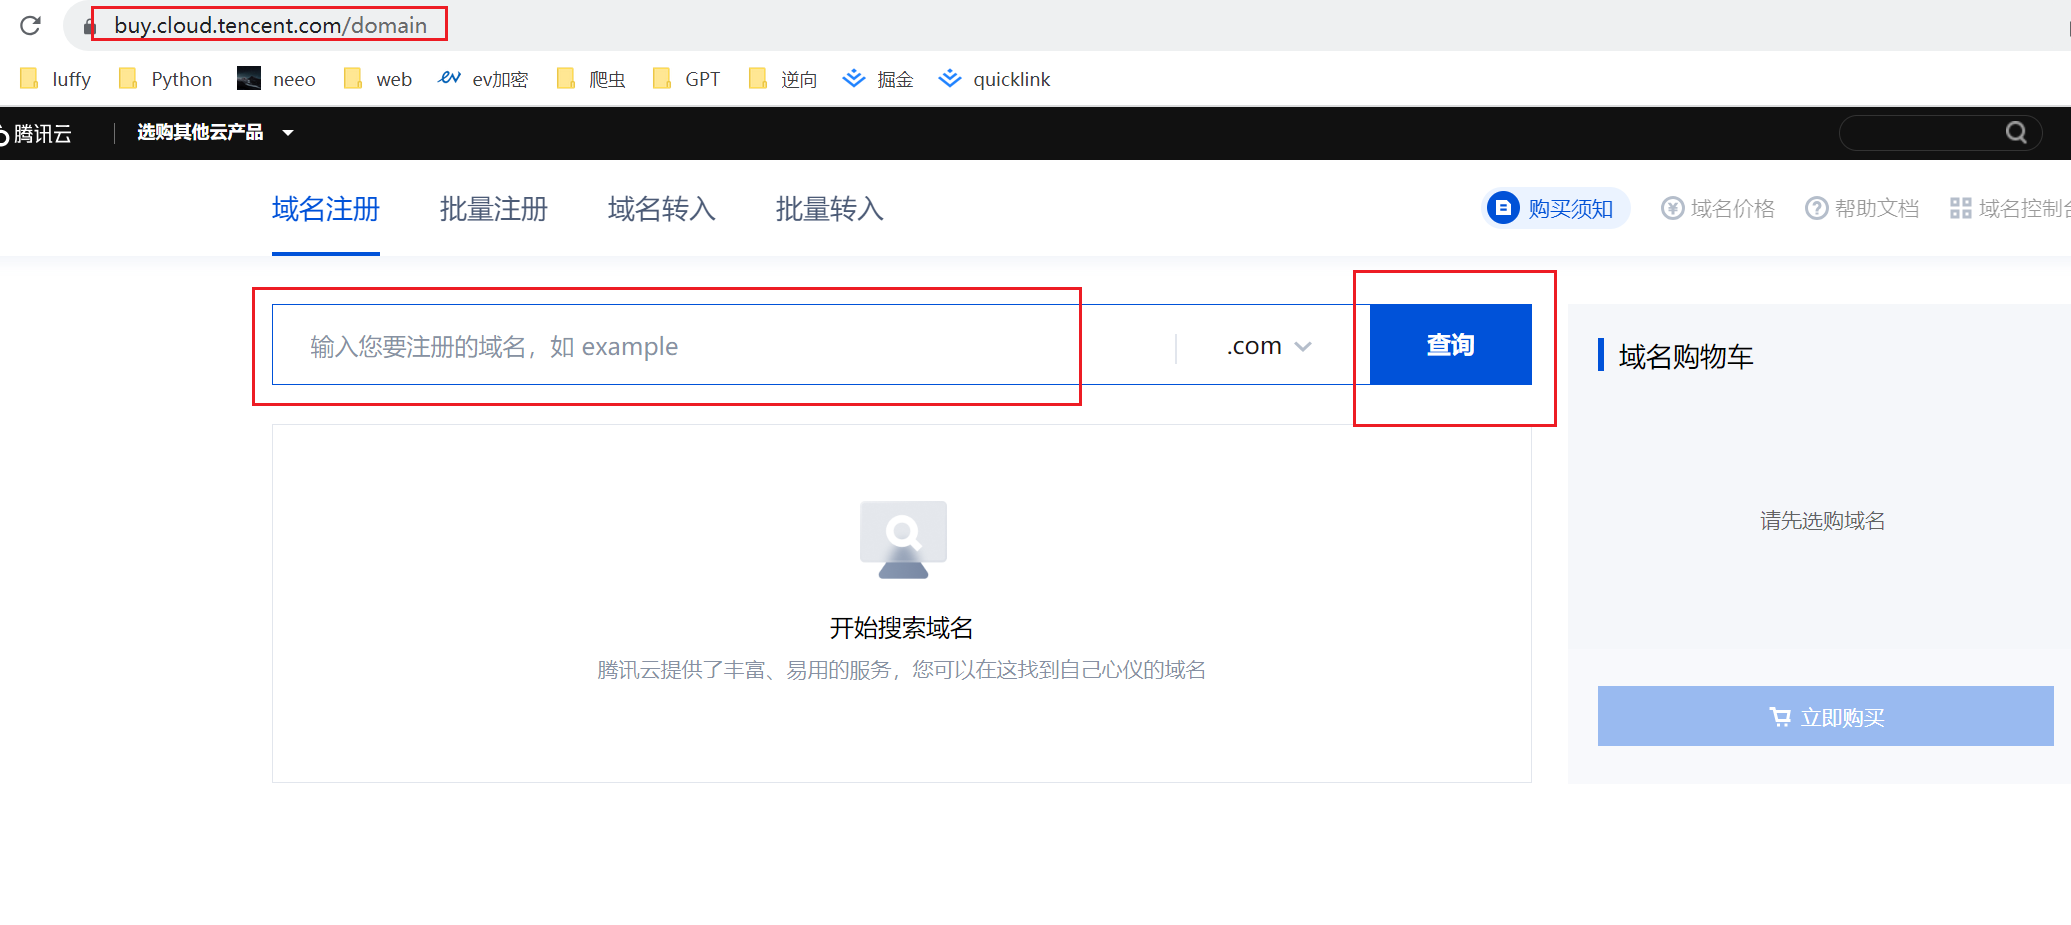
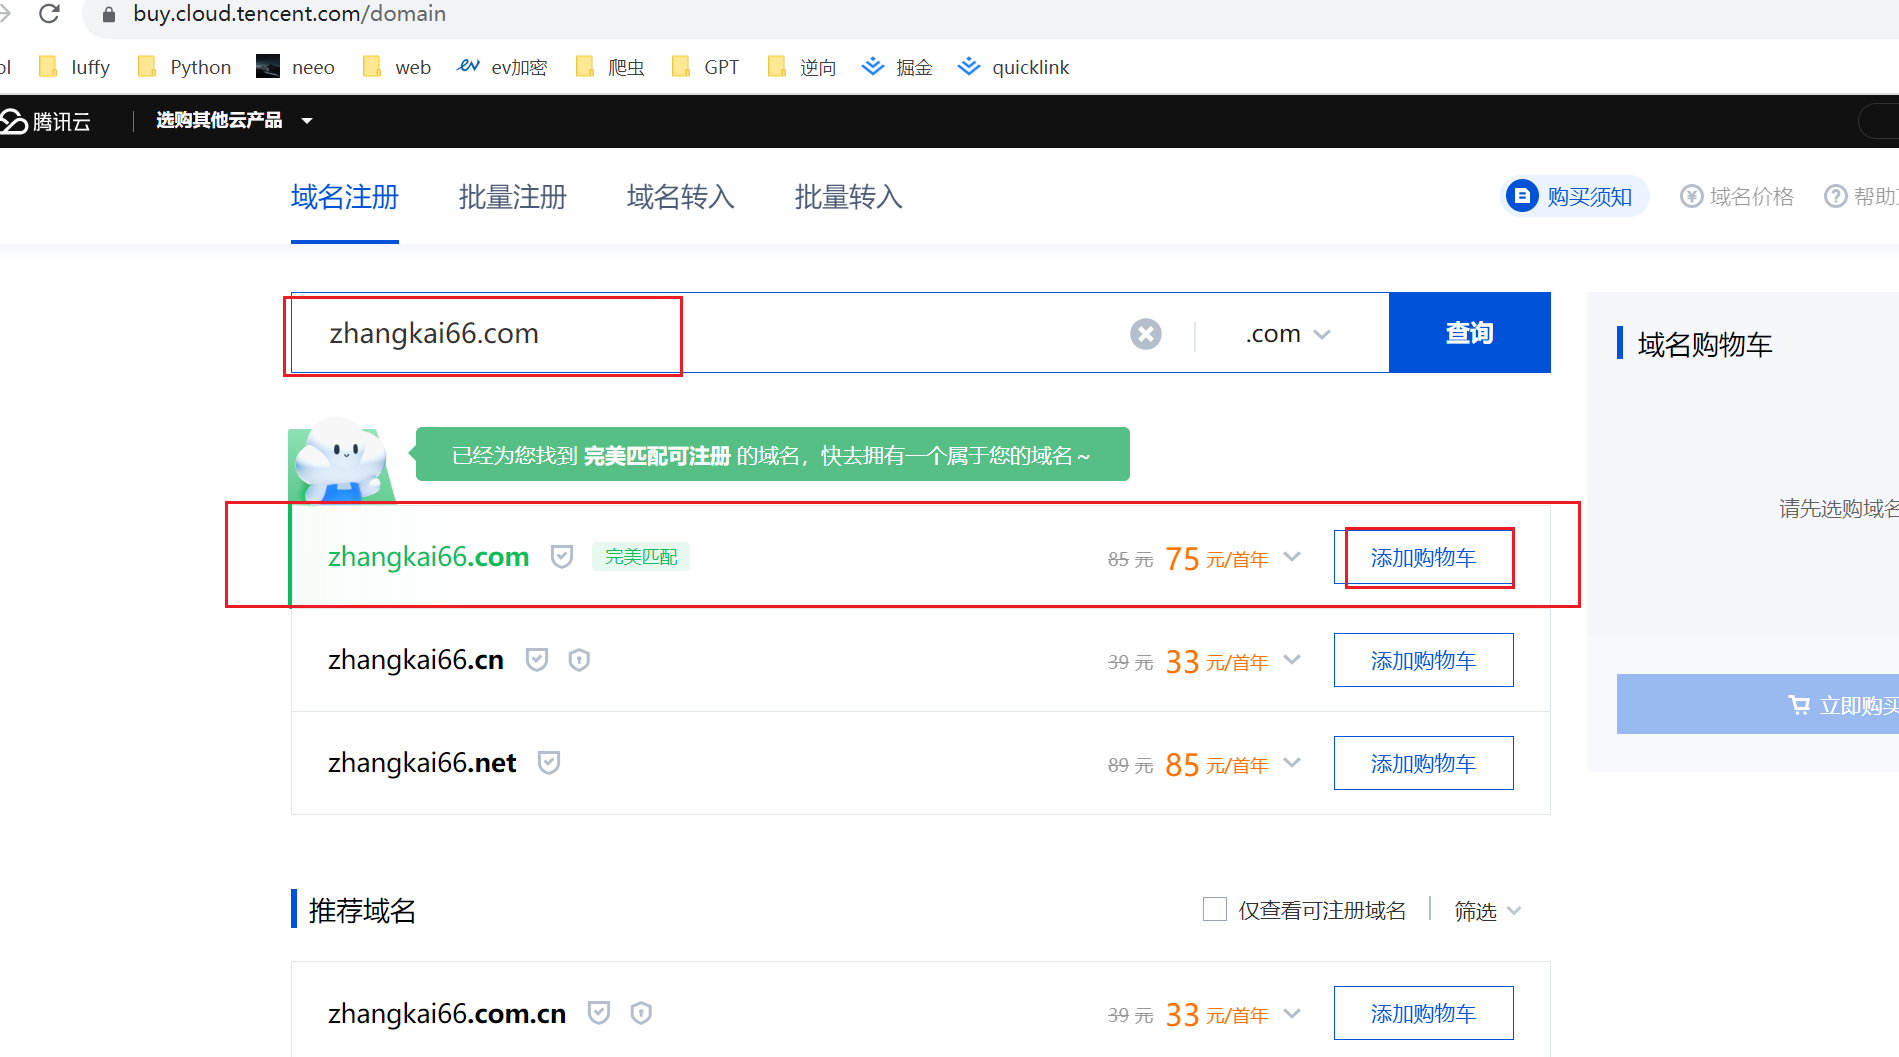
购买域名
购买域名,一般原则是你买个哪个厂家的云服务器,就也买哪个厂家提供的域名。
我之前从阿里云迁移到腾讯云的时候,在阿里那边备案好的域名要迁移到腾讯云,阿里云官网做域名迁出动作,腾讯云官网做域名迁入动作,麻烦!
迁入腾讯云的域名要从新备案,更麻烦。费事,所以,你要整域名的话,要考虑好你用哪个厂家的云服务器,尽量买个久点服务器。
参考:https://buy.cloud.tencent.com/domain
#
域名备案
买完了域名,然后就要去其官网找域名备案功能,备案这个流程顺利的话需要十天半个月的。
你可以在手机上下载云服务器的微信小程序,在小程序上搜索"腾讯云备案小程序",然后开始按提示操作即可。
整个备案过程也是很麻烦的,大概的流程就是填写备案申请。让你提交啥材料你就提交啥材料,然后提交到云服务器厂家审核,有问题的话会有小姐姐电话联系你说你哪里需要修改,然后你就修改之后,继续提交申请,继续审核,然后这个云服务器厂家审核通过了,会给你发短信提醒:
【腾讯云】尊敬的用户,恭喜您提交的(主办单位名称: xxx,备案订单号:3016xxxxxxxxxxxx)备案订单通过腾讯云备案初审,您的备案信息已提交管局审核。管局受理后,备案负责人(xxx)将会收到管局下发短信核验通知,请收到短信后在24小时内按照短信提示登录工信部网站进行短信核验。超时未验证导致备案订单被退回:https://mc.tencent.com/ldERfhrH。审核期间,请勿调整网站内容和域名信息,并保持电话畅通。登录控制台:https://mc.tencent.com/rExpTtQF 。您的账号(账号ID:10001xxxxxx,昵称:xxxxxx)。
这个时候,你按照短信提兴去对应的网址上登录短信中的账号和昵称,进行短信验证。
继续等待,因为要把你的备案申请提交到国家工业和信息化部进行审核。这个阶段可能会有电话垂询,问你为啥备案之类的,不过一般良民应该接不到这个电话。
国家工业和信息化部审核通过之后,会给你发短信,由于我在阿里备过案,迁移到腾讯云之后,从新的备的案,所以短信提示是下面这样的。
【工业和信息化部】尊敬的用户xxx,您的备案信息已被变更,详情请咨询您的接入服务提供商。【工信部ICP备案】
总之,现在域名备案搞定了.....
总之域名备案是个比较麻烦的步骤,比较费时费力。
微信搜索备案小程序:

然后按照指引进行备案。
域名解析
这一步相当于让域名和你云服务器的公网ID做个映射,让外部访问域名就能解析到你的云服务器公网IP上去。
备案成功之后,登录云服务器控制台,找到域名解析,将备案好的域名和你的服务器进行解析,腾讯云是这个地址:https://console.cloud.tencent.com/cns (opens new window)。
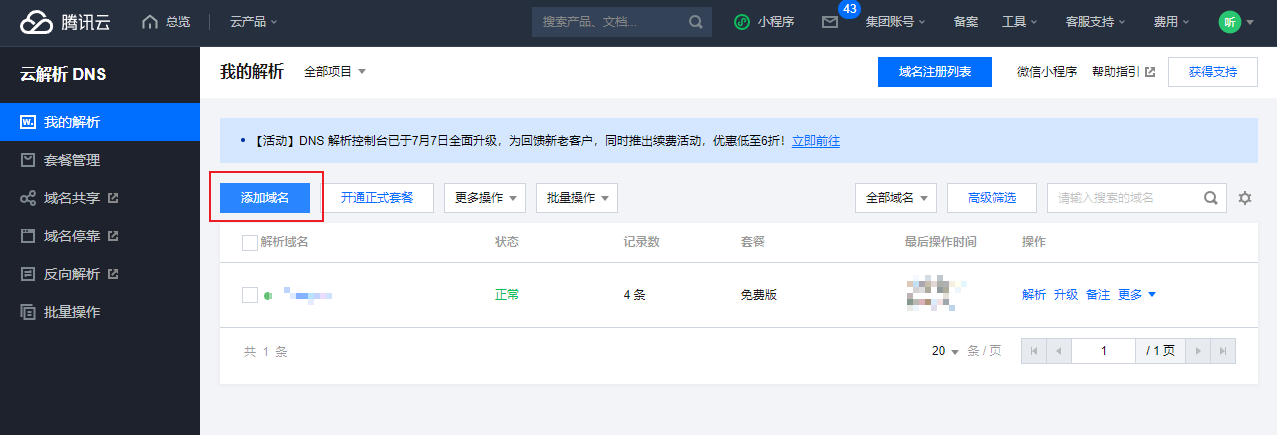
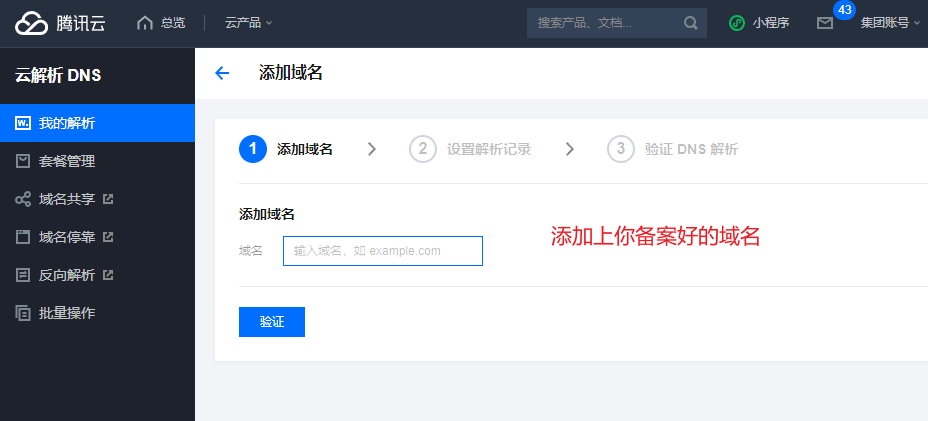
添加域名解析:
解析成功之后,你可以查看一下:
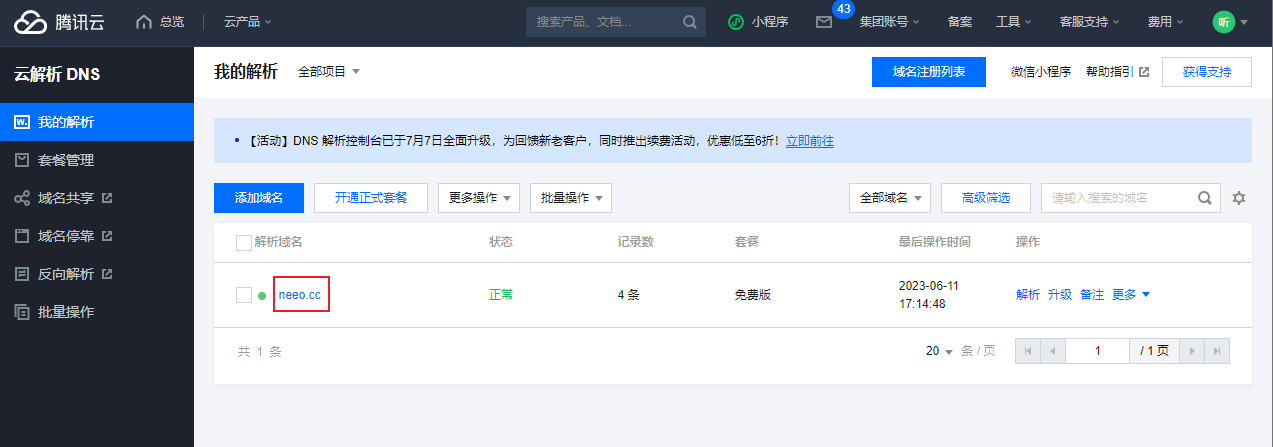
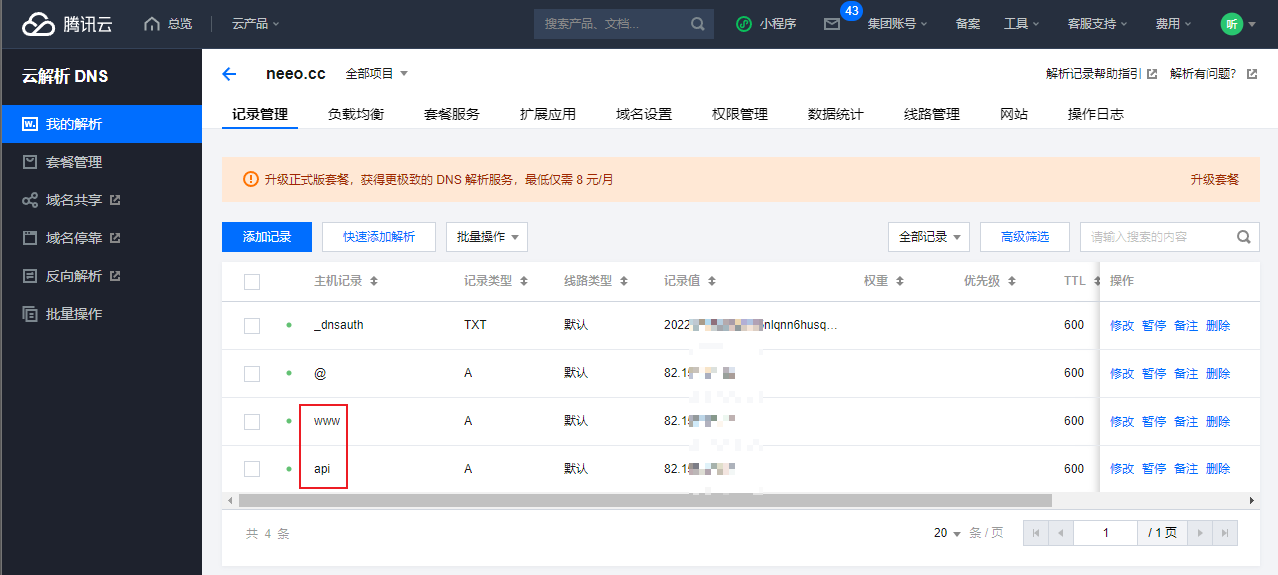
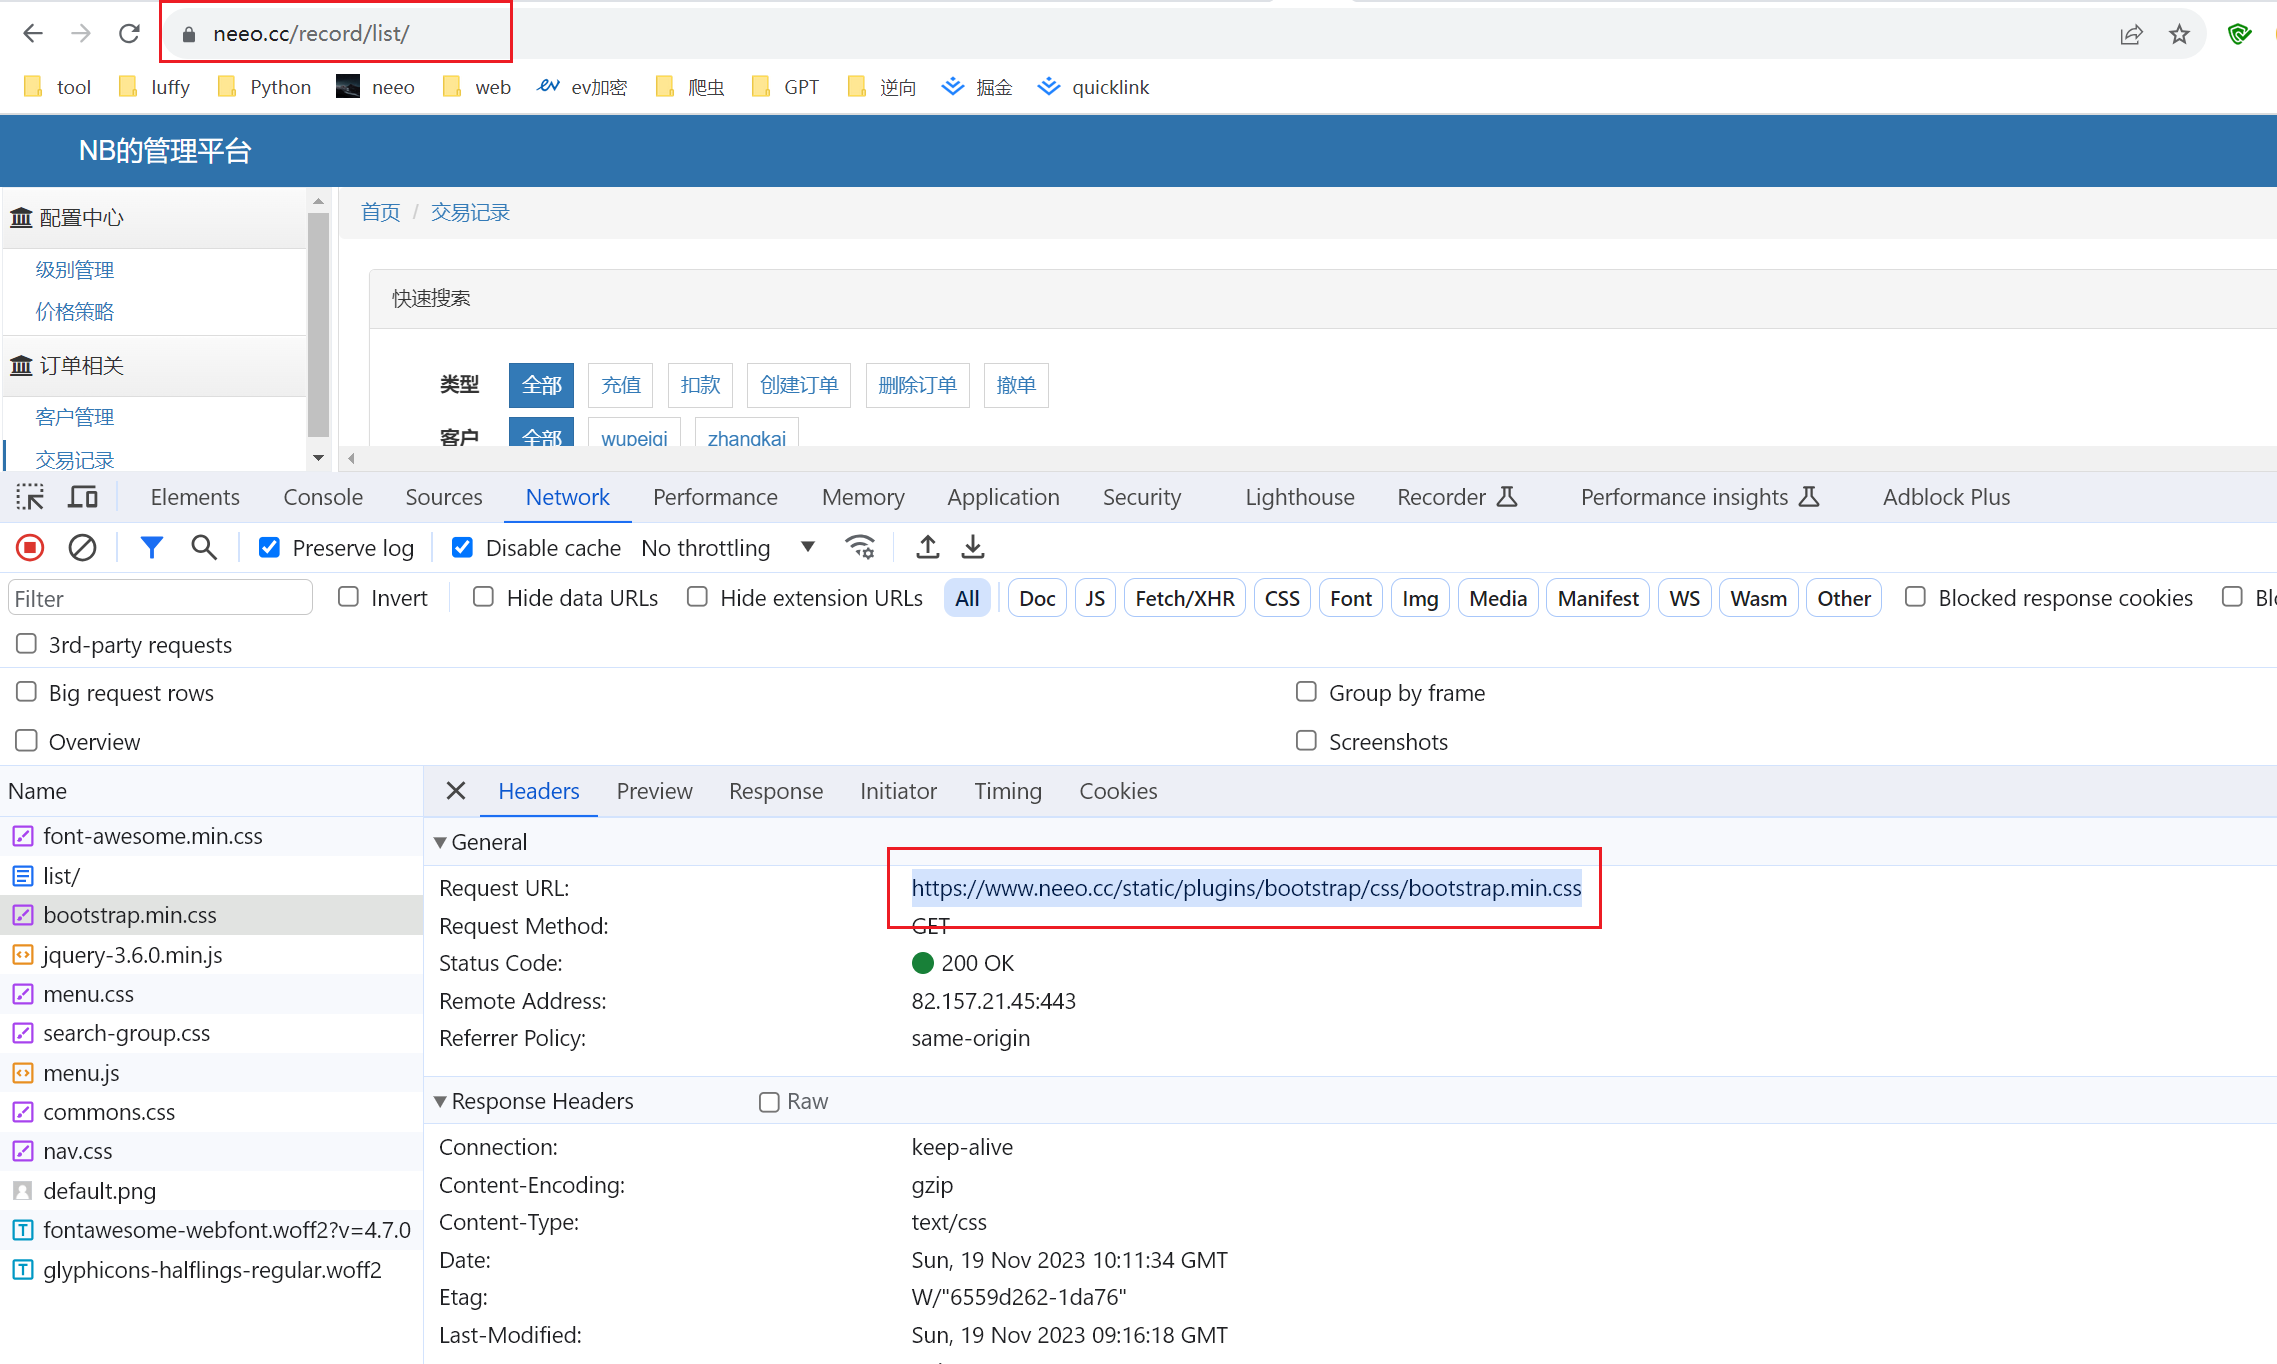
# 我备案好的域名是www.neeo.cc
# 公网IP是82.157.21.45
# 那么腾讯云这边直接给我提供好了两个域名都可以解析到公网IP
# 即www开头的和api开头的都可以
www.neeo.cc
api.neeo.cc

# 如果是阿里云的,如果只有一个www的,那么你可以手动添加一个二级域名,也就是添加一个api的,这个不懂可以百度了
2
3
4
5
6
7
8
总之,域名解析完事了
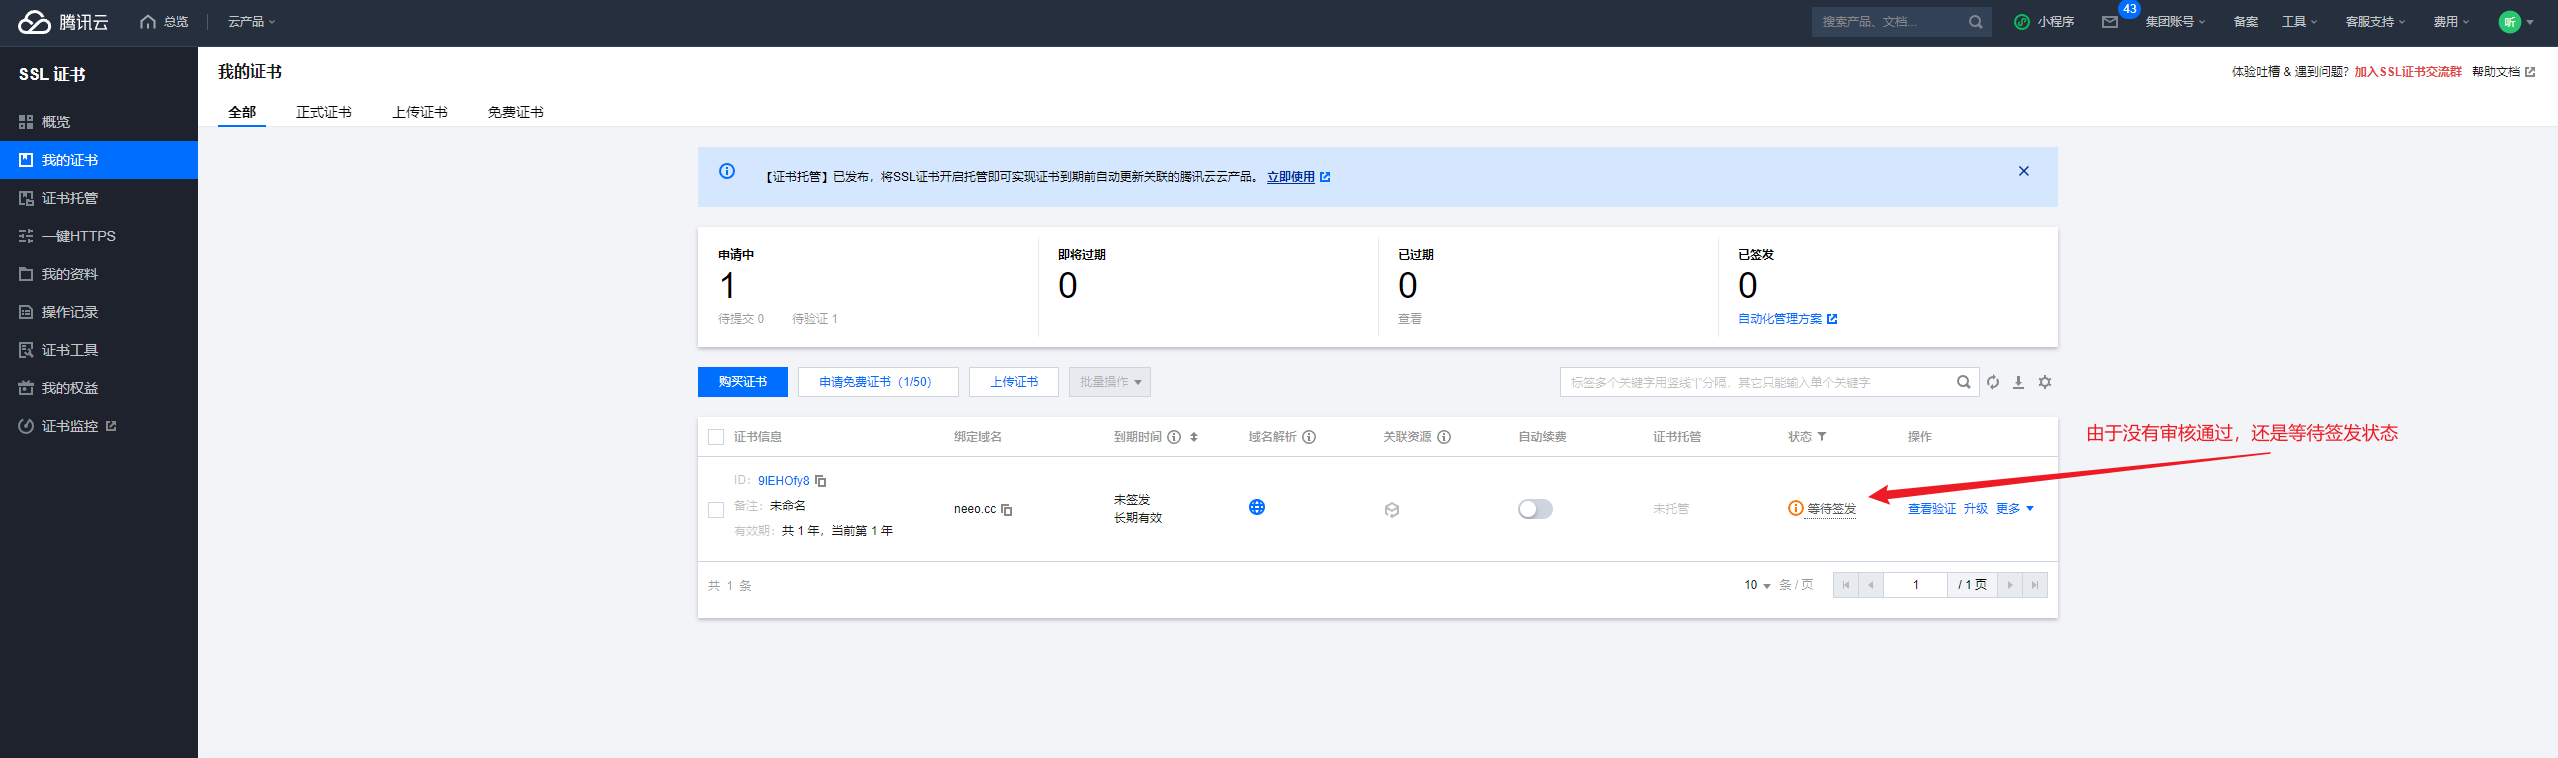
# ssl证书申请并上传到服务器
我这里还是以腾讯云服务器为例,去腾讯云官网申请免费证书,这个地址:https://console.cloud.tencent.com/ssl (opens new window)
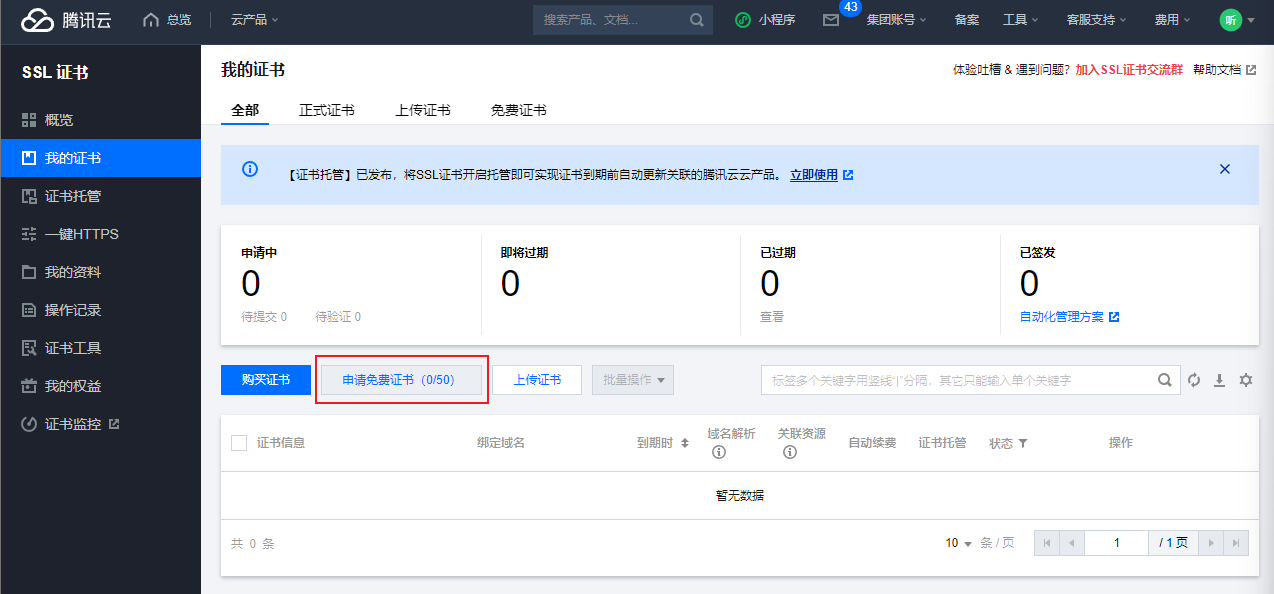
我这里申请免费的,有钱大佬请上正式证书。
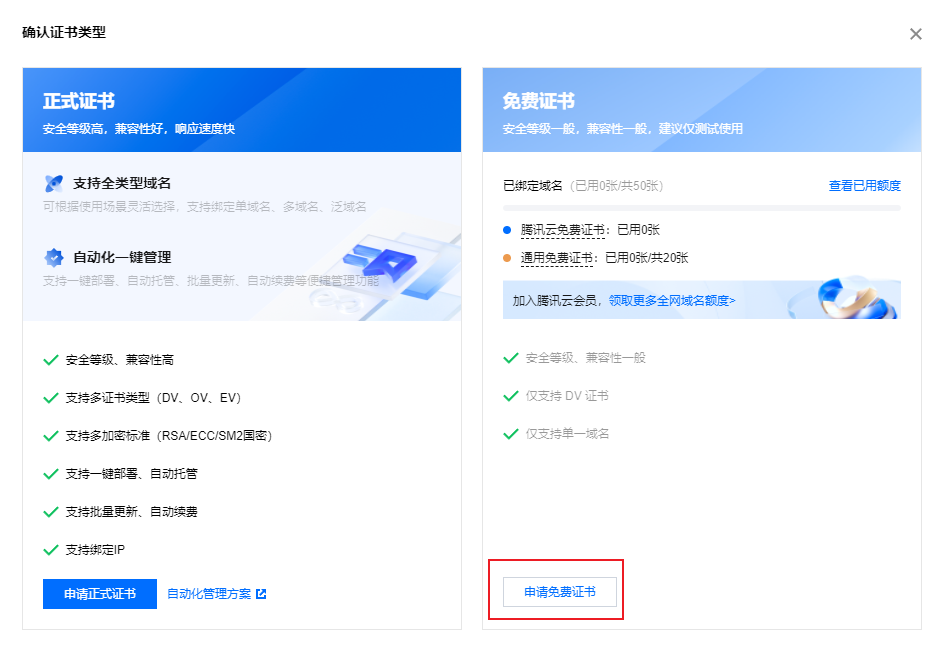
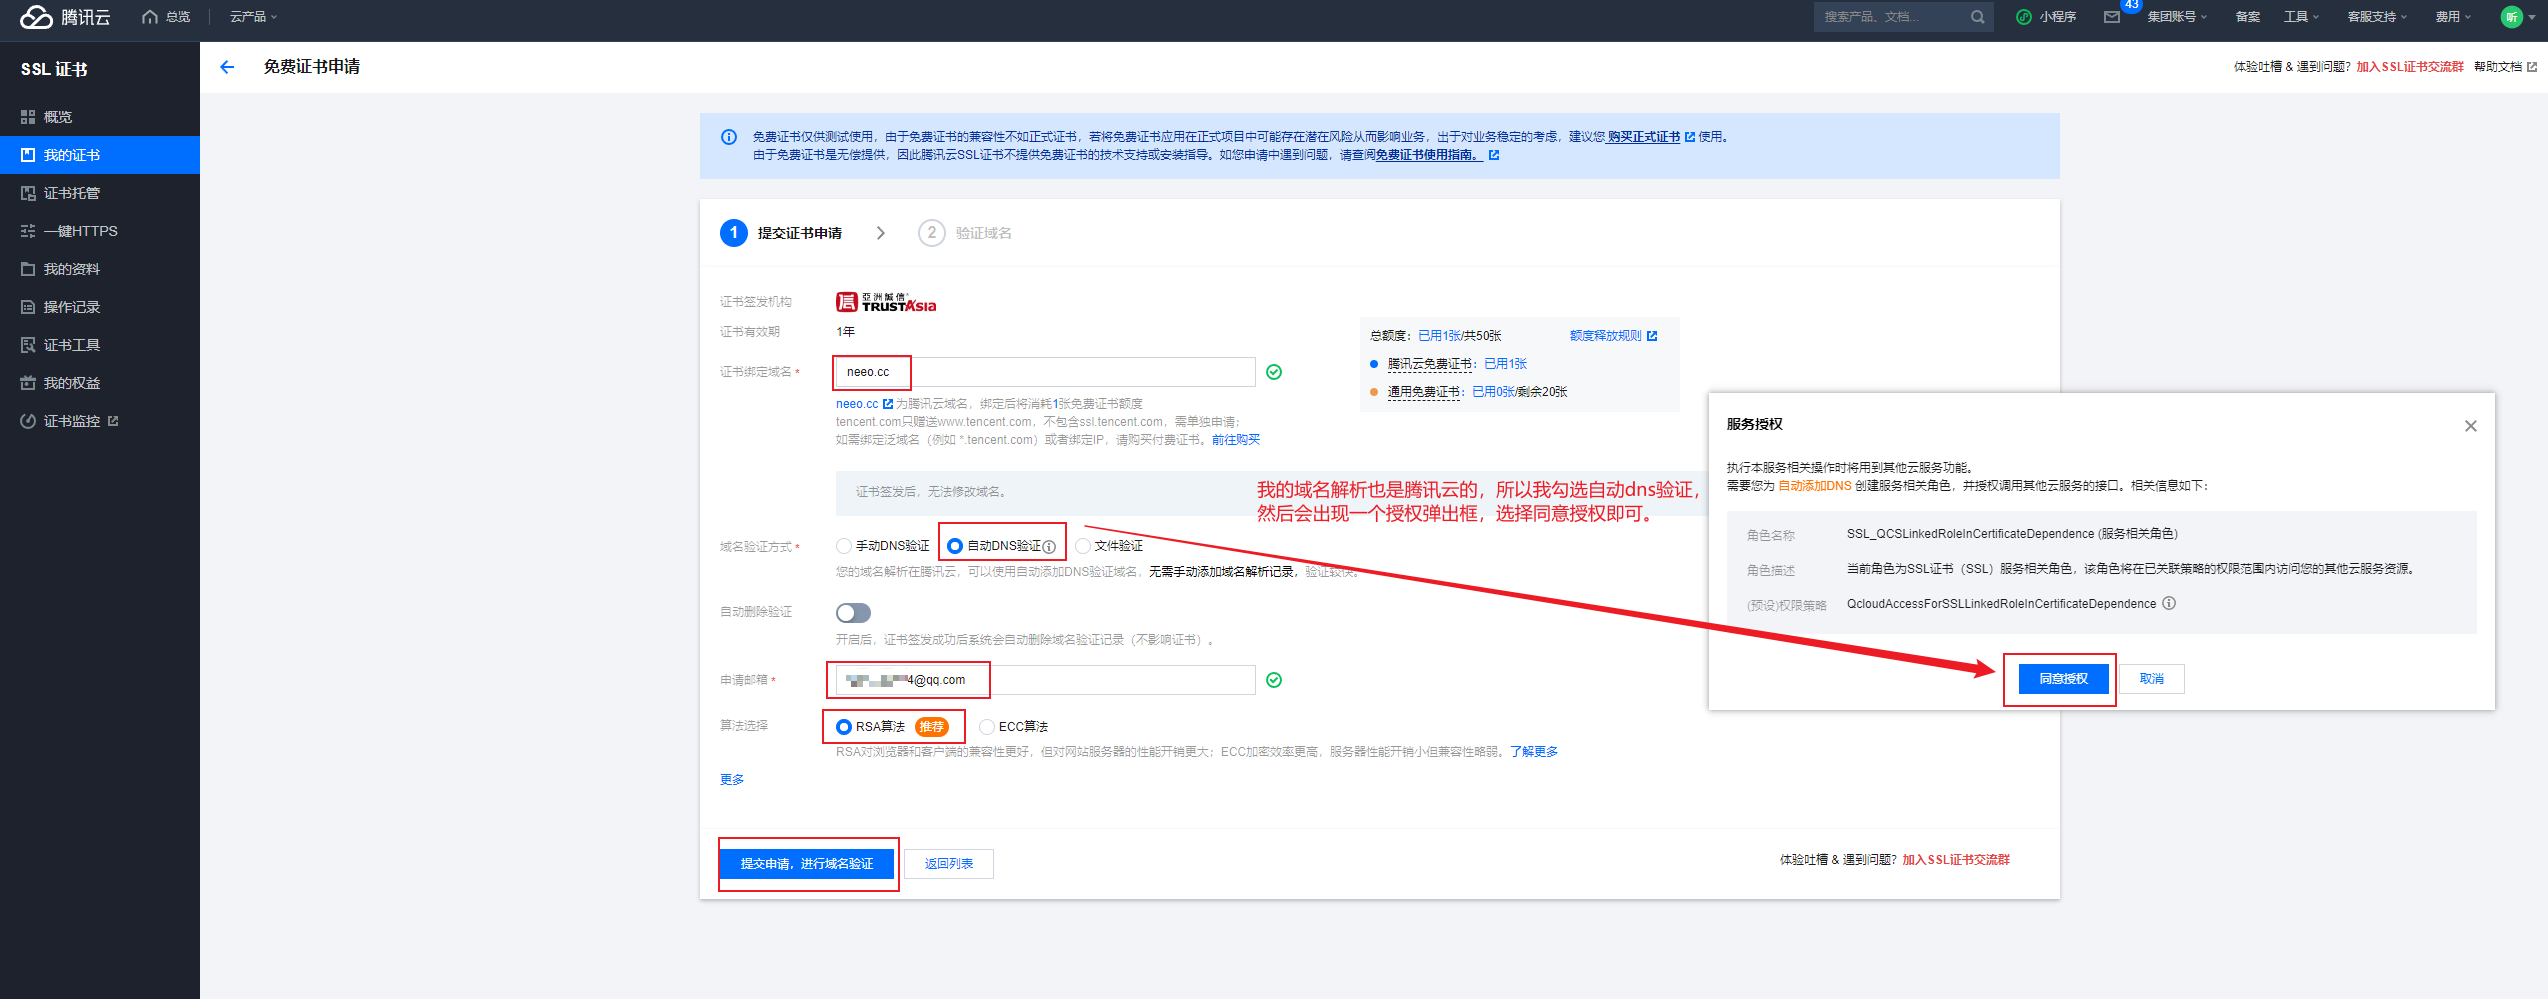
填写相关信息申请信息。这个ssl证书对应的域名是www.neeo.cc,我们将来给前端用。
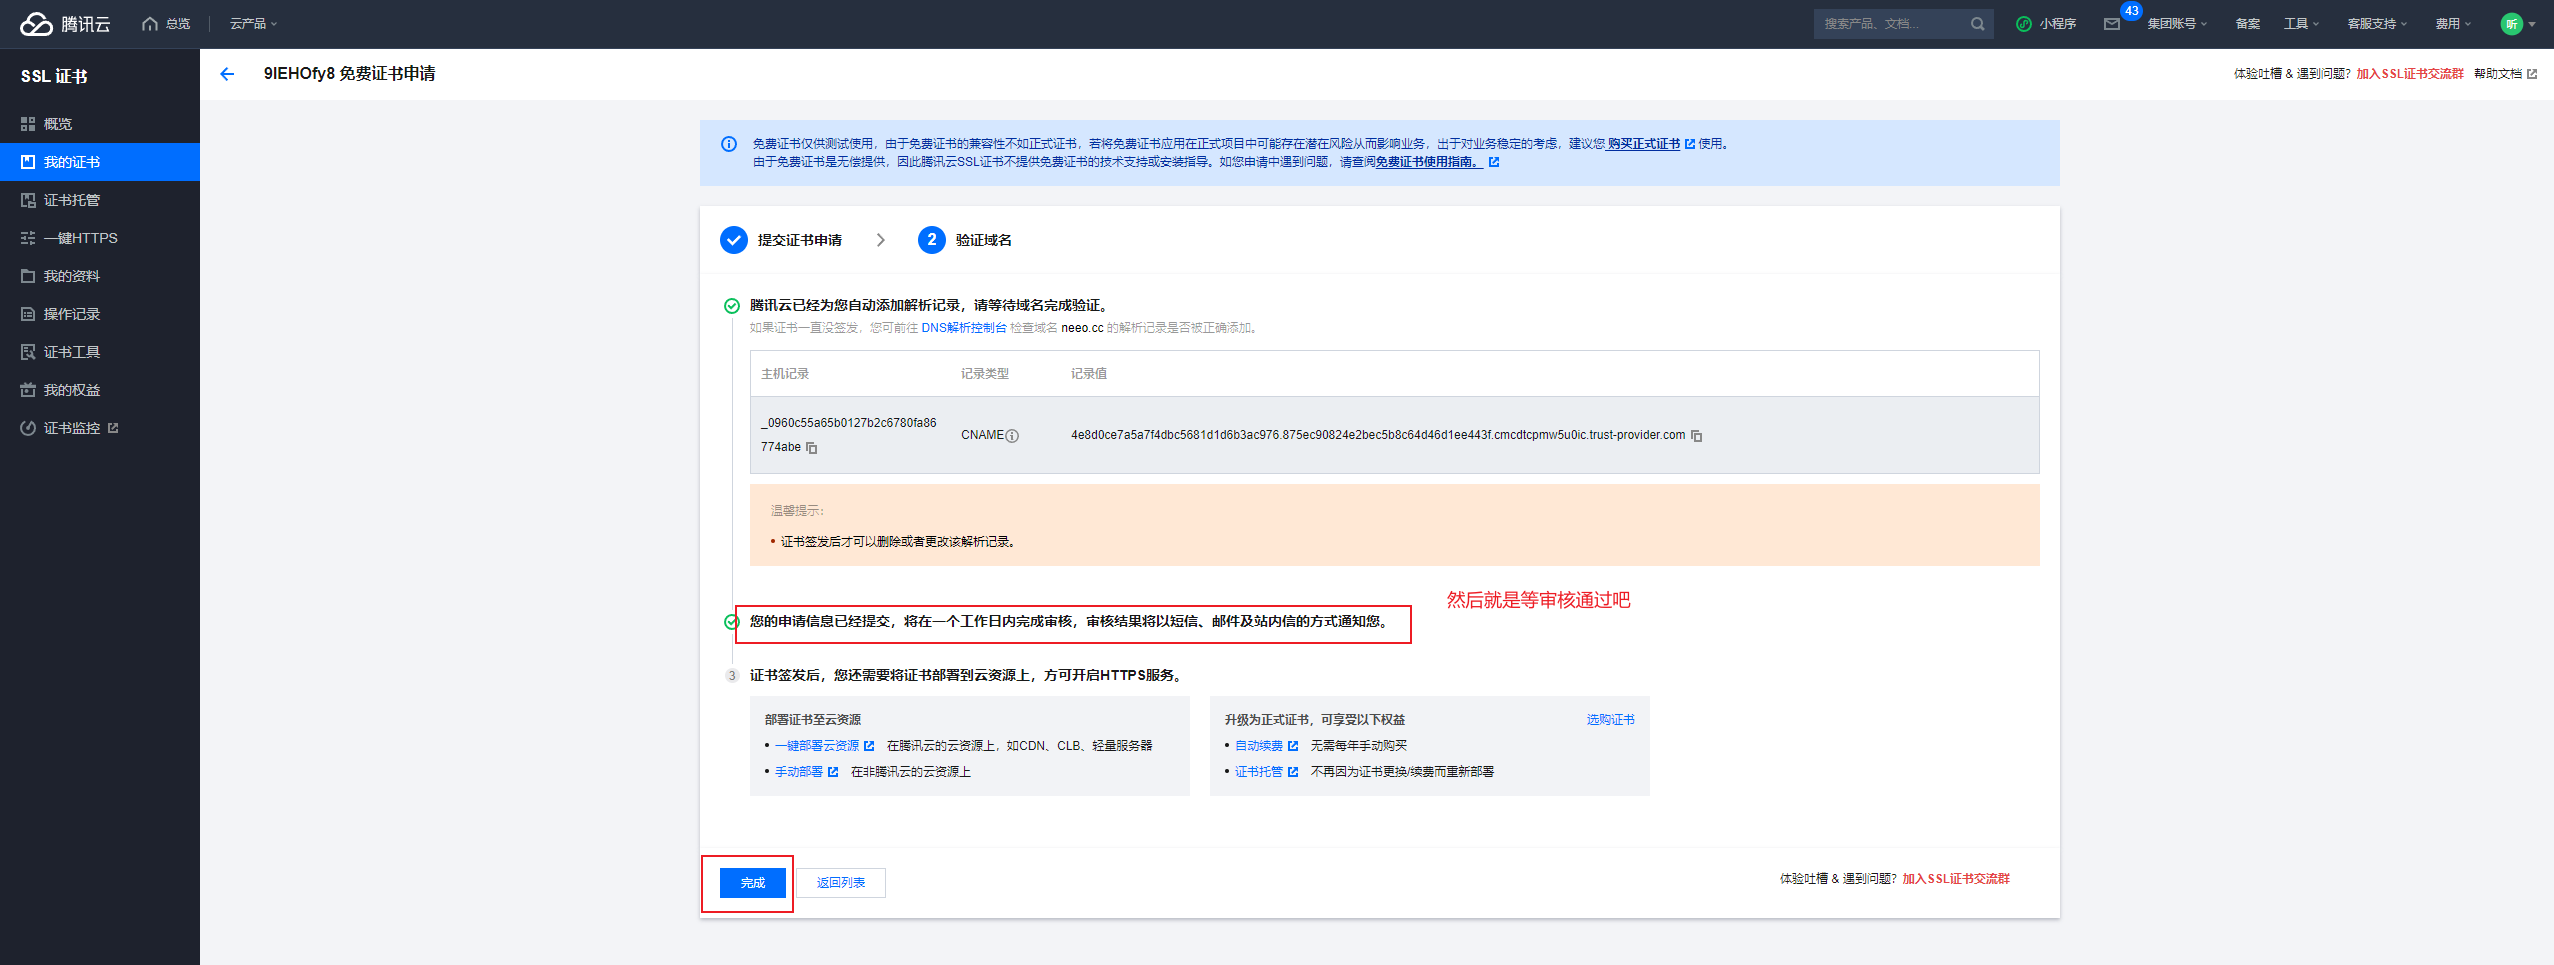
等审核,会有短信提示:
【腾讯云】尊敬的腾讯云用户,您购买的域名为 neeo.cc 的 TrustAsia TLS RSA CA 证书(年限:1年,证书ID:9lEHOfy8)现已进入审核验证阶段。请您耐心等待系统自动完成DNS验证,验证通过后证书将会颁发。域名验证方式可参考:https://mc.tencent.com/GhB9OLKA 。登录证书控制台:https://mc.tencent.com/hmpuWwkI 。您的腾讯云账号(账号ID:10xxxxx,昵称:听xxxx)
很快的就通过了。
审核通过,也会收到短信通知:
【腾讯云】尊敬的用户,您的域名 neeo.cc 的 TrustAsia TLS RSA CA(1年)证书已审核通过并成功颁发。登录控制台查看证书:https://mc.tencent.com/g9algEWM 。证书部署可参考文档:https://mc.tencent.com/ZKGAc9go 。您的腾讯云账号(账号ID:10xxxxx,昵称:听xxxx)。
下载证书:
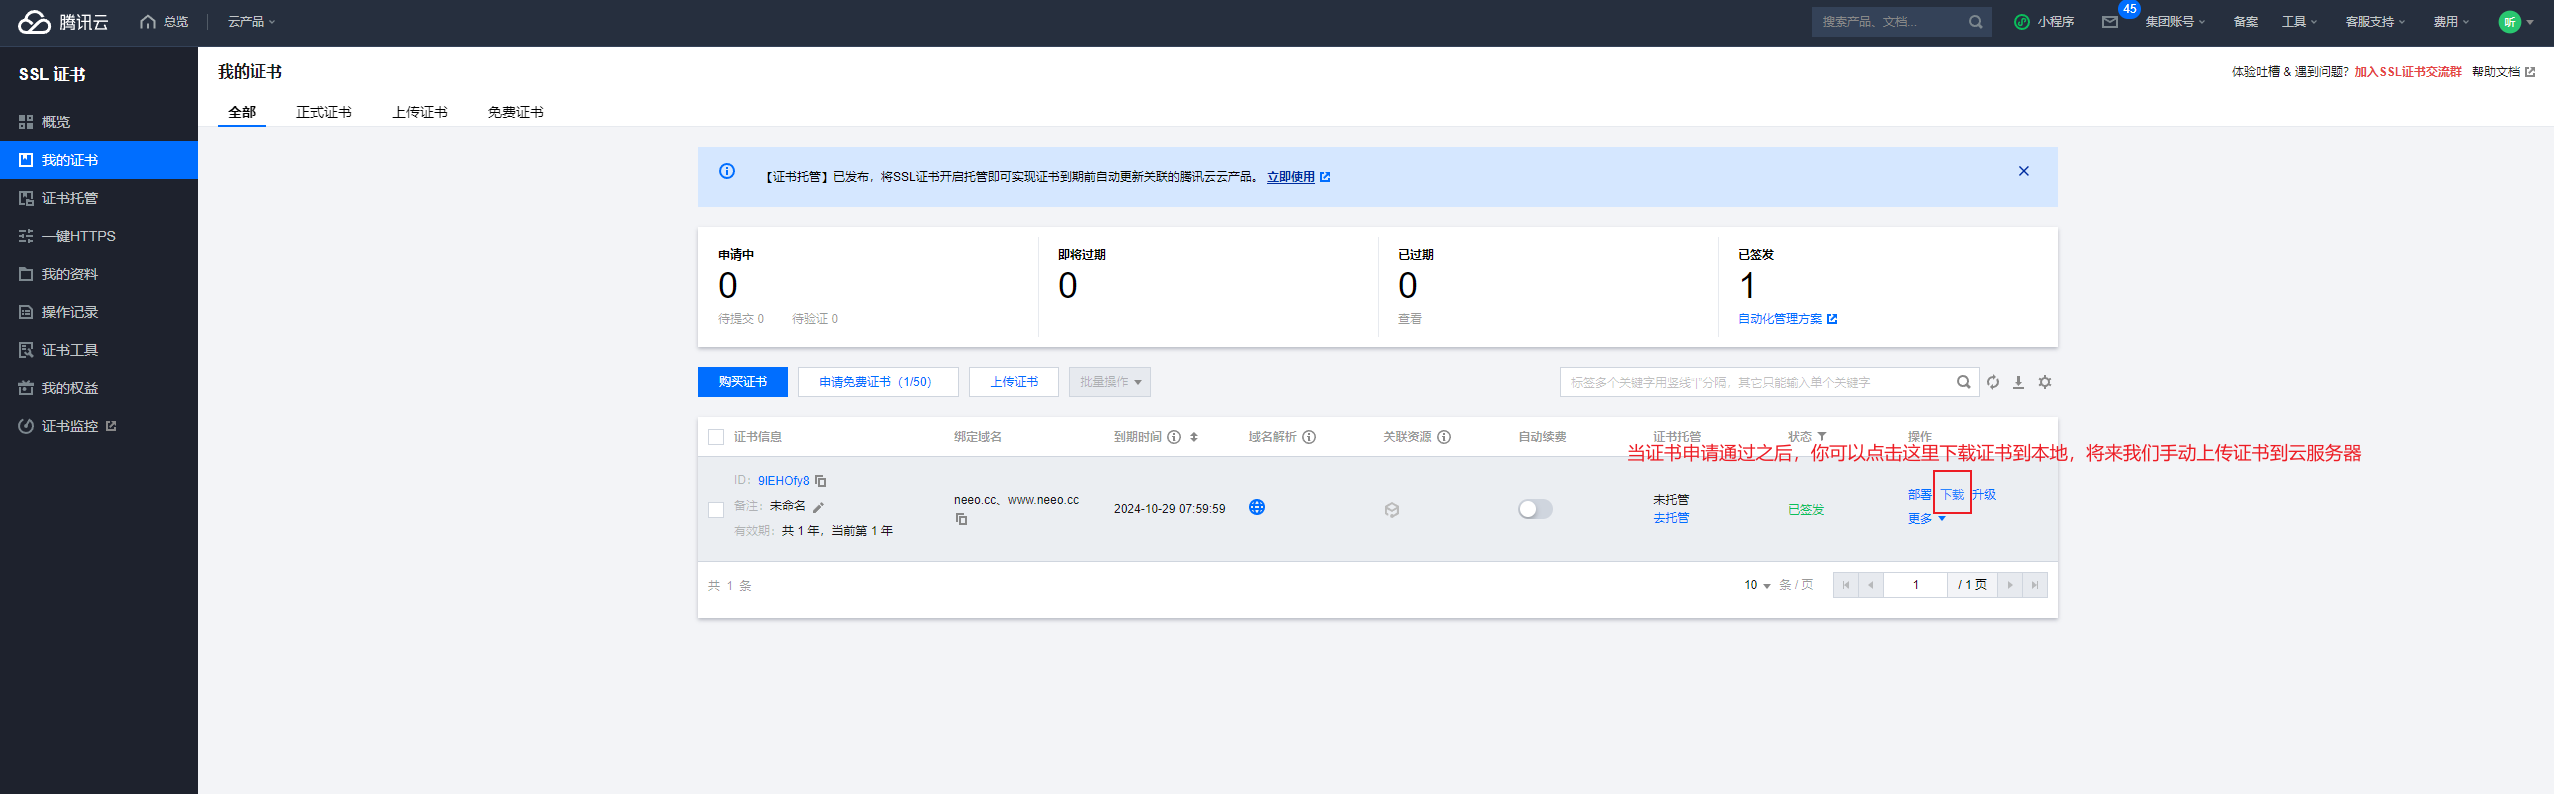
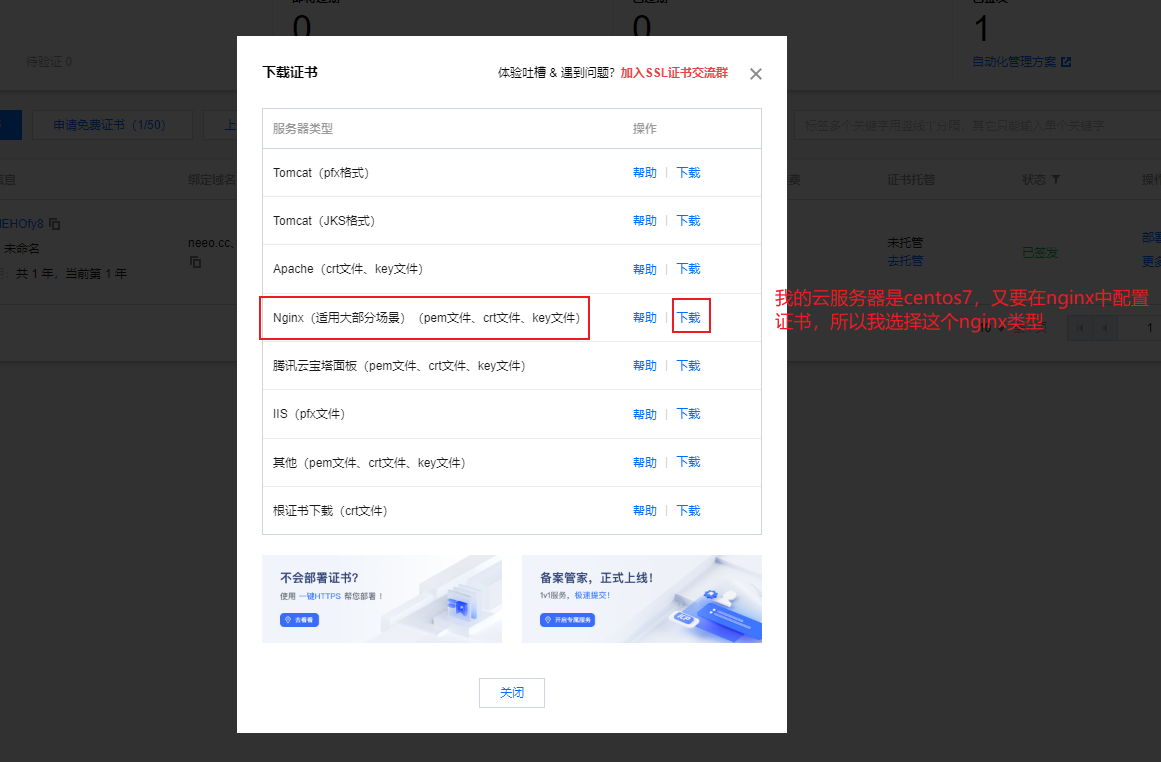
下载到本地后,直接将压缩包上传到云服务器:
cd /od
unzip neeo.cc_nginx.zip
ls

[root@cs od]# ls
allstatic  day13.zip  neeo.cc_nginx      openssl-1.1.1q         script
day13      logs       neeo.cc_nginx.zip  openssl-1.1.1q.tar.gz  venv
2
3
4
5
6
7
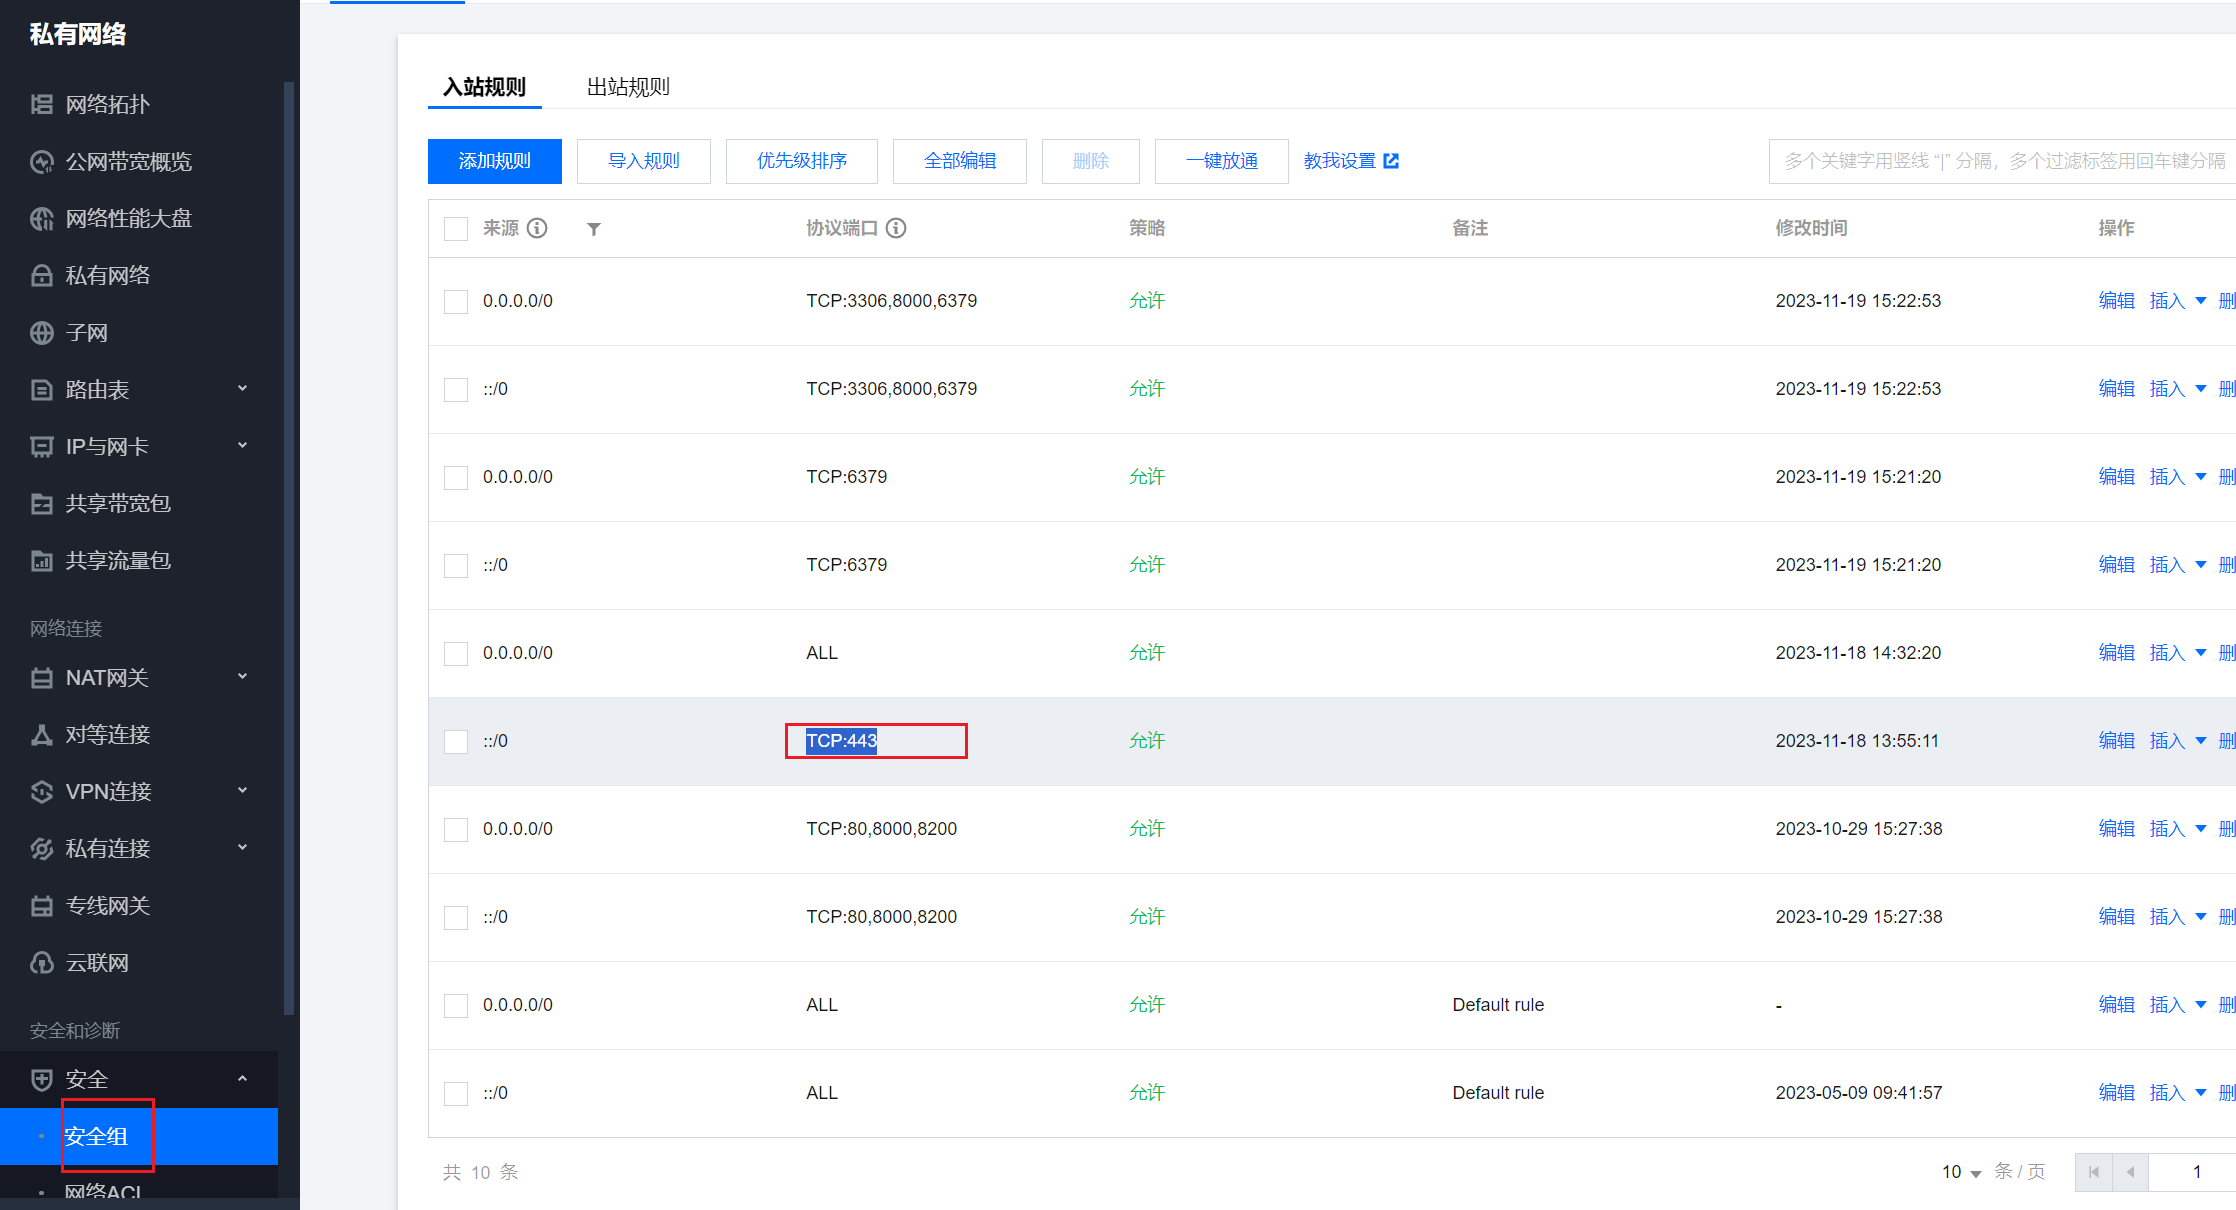
# nginx中配置证书
配置参考腾讯云官网:https://cloud.tencent.com/document/product/400/35244?from_cn_redirect=1 (opens new window)
注意,云服务器中的安全组注意放开443端口。
首先要拿到ssl两个文件的绝对路径:
cd /od/neeo.cc_nginx/
ls

# 接下来手动拼接出来这俩绝对路径
/od/neeo.cc_nginx/neeo.cc_bundle.crt
/od/neeo.cc_nginx/neeo.cc.key
2
3
4
5
6
编辑nginx的配置文件:
mv /opt/my_nginx/conf/nginx.conf /opt/my_nginx/conf/nginx.conf.bak
vim /opt/my_nginx/conf/nginx.conf
2
文件内容。
#user  nobody;
worker_processes  1;

#error_log  logs/error.log;
#error_log  logs/error.log  notice;
#error_log  logs/error.log  info;

#pid        logs/nginx.pid;


events {
    worker_connections  1024;
}


http {
    include       mime.types;
    default_type  application/octet-stream;
    sendfile        on;
    keepalive_timeout  65;


    server {
        #SSL 默认访问端口号为 443
        listen 443 ssl;
        #请填写绑定证书的域名
        server_name www.neeo.cc;
        #请填写证书文件的相对路径或绝对路径
        ssl_certificate /od/neeo.cc_nginx/neeo.cc_bundle.crt;
        #请填写私钥文件的相对路径或绝对路径
        ssl_certificate_key /od/neeo.cc_nginx/neeo.cc.key;
        ssl_session_timeout 5m;
        #请按照以下协议配置
        ssl_protocols TLSv1.2 TLSv1.3;
        #请按照以下套件配置,配置加密套件,写法遵循 openssl 标准。
        ssl_ciphers ECDHE-RSA-AES128-GCM-SHA256:HIGH:!aNULL:!MD5:!RC4:!DHE;
        ssl_prefer_server_ciphers on;
        gzip on;
        gzip_static on;
        gzip_min_length 1k;
        gzip_vary on;
        gzip_proxied any;
        gzip_comp_level 9;
        gzip_buffers 4 16k;
        gzip_http_version 1.0;
        # 进行压缩的文件类型
        gzip_types text/plain text/css application/json application/javascript text/xml application/xml application/xml+rss text/javascript image/jpeg image/gif image/png image/svg+xml;
        # 访问https://www.nee.cc的请求转发给uwsgi
        location / {
            include uwsgi_params;
            uwsgi_pass 0.0.0.0:8000;
        }
        location /static {
            alias /od/allstatic/;
        }
     }

    server {
        listen 80;
        #请填写绑定证书的域名
        server_name www.neeo.cc;
        #把http的域名请求转成https
        return 301 https://$host$request_uri;
    }

}
2
3
4
5
6
7
8
9
10
11
12
13
14
15
16
17
18
19
20
21
22
23
24
25
26
27
28
29
30
31
32
33
34
35
36
37
38
39
40
41
42
43
44
45
46
47
48
49
50
51
52
53
54
55
56
57
58
59
60
61
62
63
64
65
66
完事之后:
[root@cs neeo.cc_nginx]# nginx -t
nginx: the configuration file /opt/my_nginx/conf/nginx.conf syntax is ok
nginx: configuration file /opt/my_nginx/conf/nginx.conf test is successful
[root@cs neeo.cc_nginx]# nginx -s reload
2
3
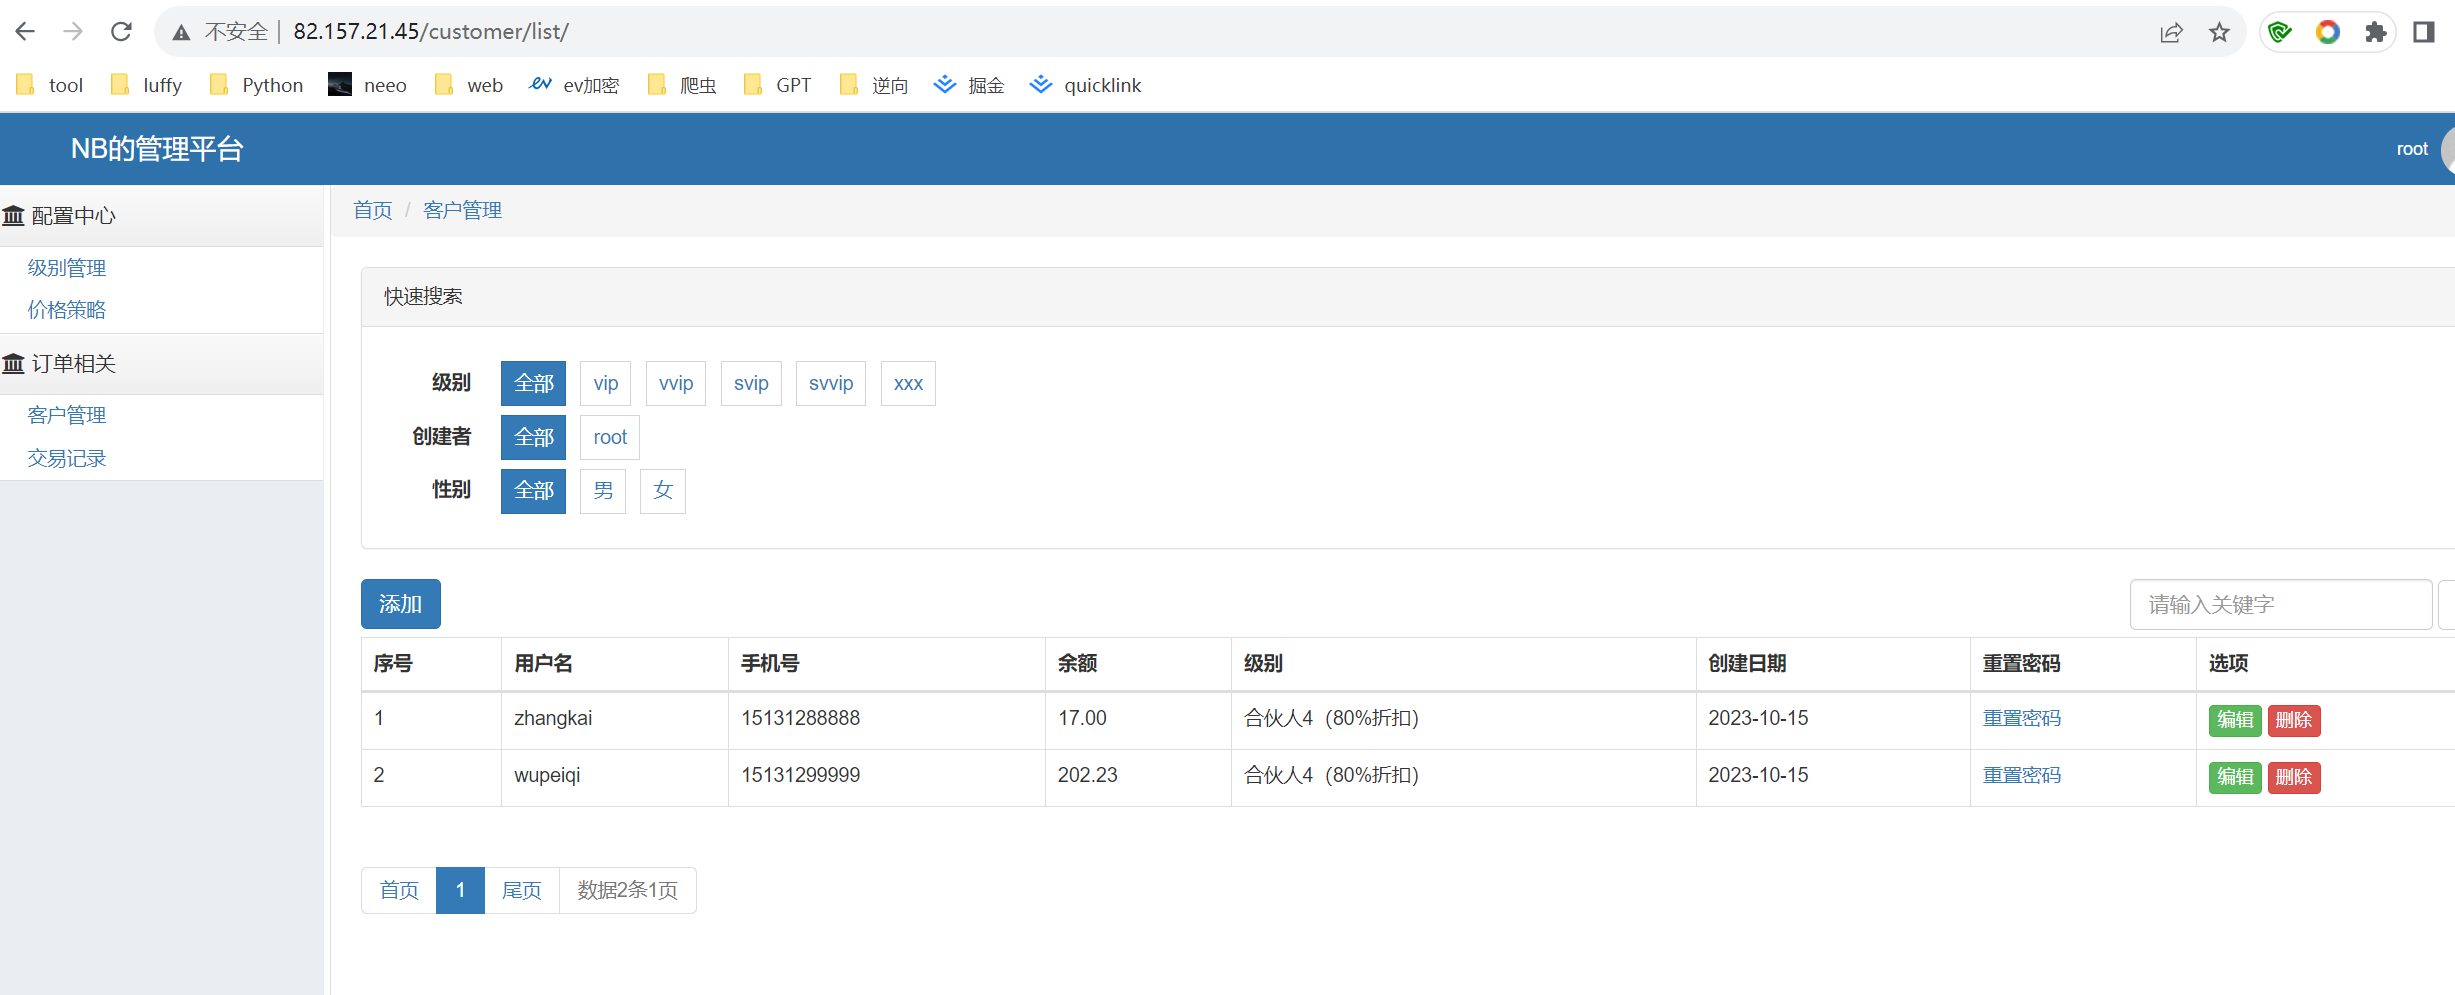
4
你的浏览器访问就是https的了。
# 让程序实现后台运行
云服务器上执行
每一次项目代码更新,都可以重新覆盖掉/od,下面的day13项目,然后下面的命令即可。
cd /od
source /od/venv/bin/activate
pip install -r day13/requirements.txt
pkill -9 uwsgi
nohup /od/venv/bin/uwsgi --ini ./script/uwsgi.ini >/dev/null 2>&1 &
2
3
4
5
主要用的是nohup命令。
# 代码优化
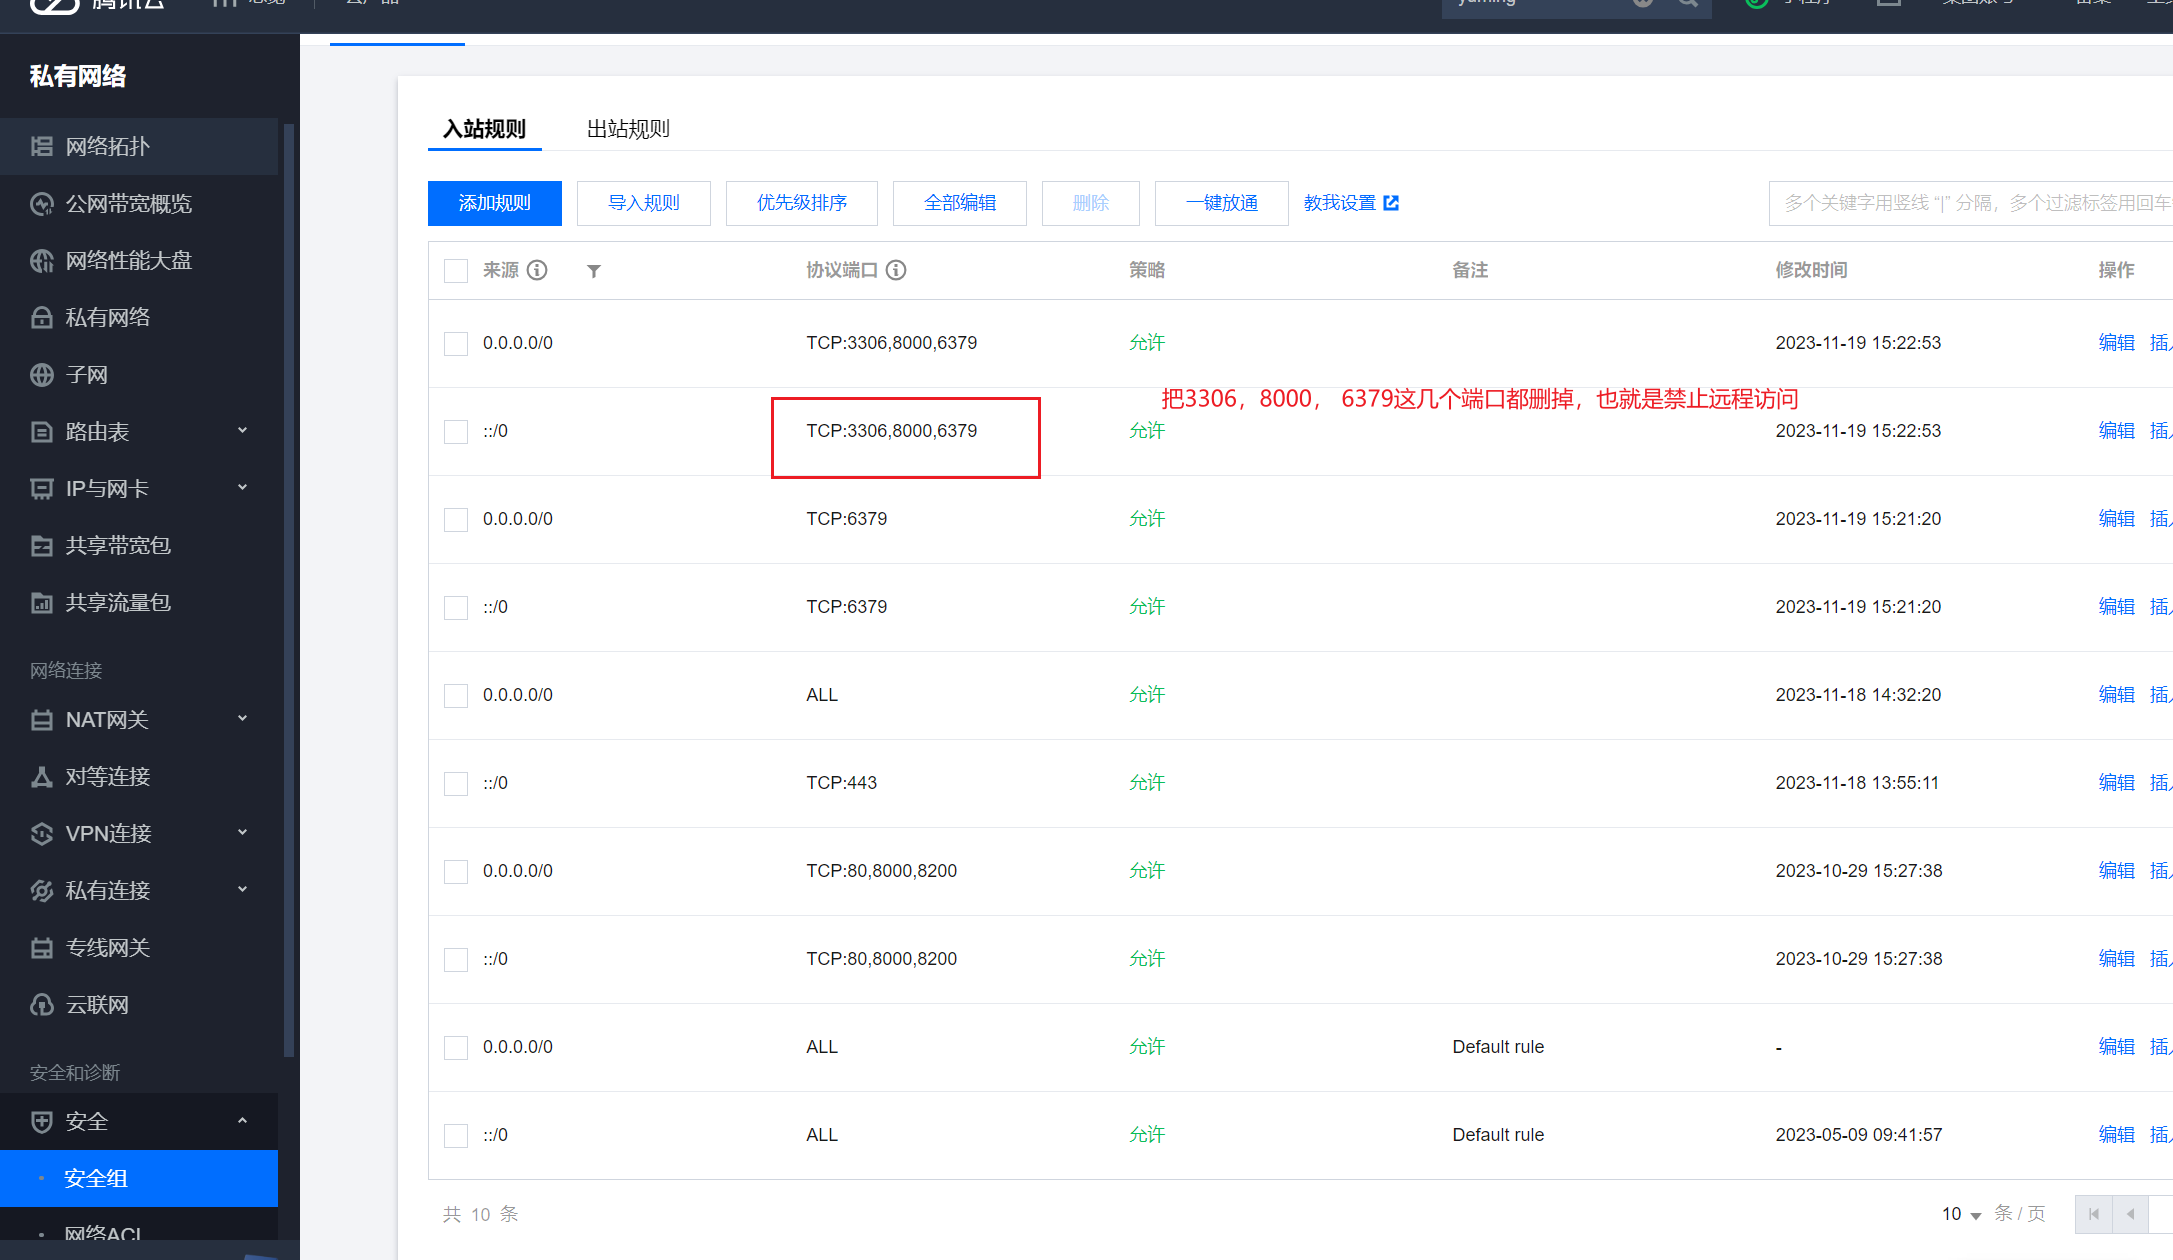
mysql和Redis都能支持远程访问,肯定是不行的,容易被黑,所以,我们需要设置一下,仅能本地访问,所以,直接调整如下几个文件。
项目的配置文件pro_settings.py:
ALLOWED_HOSTS = ["*"]


STATIC_ROOT = "/od/allstatic/"

# 先开着调试模式
DEBUG = False
# 云服务器中的MySQL配置
DATABASES = {
    'default': {
        'ENGINE': 'django.db.backends.mysql',
        'NAME': 'day13',    		#你的数据库名称
        'USER': 'zhangkai',   		#你的数据库用户名
        'PASSWORD': '123', 	#你的数据库密码
        'HOST': '127.0.0.1', 			#你的数据库主机,留空默认为localhost
        'PORT': '3306', 		#你的数据库端口
    }
}

CACHES = {
    "default": {
        "BACKEND": "django_redis.cache.RedisCache",
        "LOCATION": "redis://127.0.0.1:6379",  # 安装redis的主机的 IP 和 端口
        "OPTIONS": {
            "CLIENT_CLASS": "django_redis.client.DefaultClient",
            "CONNECTION_POOL_KWARGS": {
                "max_connections": 1000,
                "encoding": 'utf-8'
            },
            "PASSWORD": "1234"  # redis密码
        }
    }
}
2
3
4
5
6
7
8
9
10
11
12
13
14
15
16
17
18
19
20
21
22
23
24
25
26
27
28
29
30
31
32
33
redis的配置文件vim /opt/redis6379/conf/redis6379.conf:
daemonize yes
# 注意,生产中, 千万不要bind 0.0.0.0,不要将Redis暴露到外网环境,防止被人攻击
bind 127.0.0.1
port 6379
pidfile /opt/redis6379/pid/redis6379.pid
logfile /opt/redis6379/logs/redis6379.log
requirepass 1234
2
3
4
5
6
7
重启Redis服务
pkill -9 redis
redis-server /opt/redis6379/conf/redis6379.conf
2
最终,重启uwsgi:
cd /od
source /od/venv/bin/activate
pip install -r day13/requirements.txt
pkill -9 uwsgi
nohup /od/venv/bin/uwsgi --ini ./script/uwsgi.ini >/dev/null 2>&1 &
2
3
4
5
在云服务器中的安全组中把uwsgi、mysql和Redis这两个对外的端口禁用掉。
修改uwsgi.ini文件,vim /od/scrit/uwsgi.ini:
[uwsgi]

# 填写订单项目的根目录
chdir=/od/day13/

# 填写与项目同名的目录,这是个相对路径,主要就是找到其内的wsgi.py这个文件
module=day13.wsgi

# 虚拟环境的根目录,也就是工作目录
home=/od/venv/

# uwsgi的主进程,其他的uwsgi的进程都是这个主进程的子进程,当你kill时,杀掉的也是这个master主进程
master=true

# uwsgi并发时的工作进程的数量,官网的建议是:2 * cup核数 + 1
# 由这几个进程来分摊并发请求
processes=3

# 临时使用http,实际部署时,通过nginx反向代理,就要把http换成socket,这点别忘了改
#http=0.0.0.0:8000
# socket=0.0.0.0:8000
# 只能云服务器本地访问
socket=127.0.0.1:8000

# 当服务器退出时,自动删除unix socket文件和pid文件
vacuum=true
2
3
4
5
6
7
8
9
10
11
12
13
14
15
16
17
18
19
20
21
22
23
24
25
26
在修改nginx配置文件,主要是uwsgi_pass 127.0.0.1:8000;:
(venv) [root@cs od]# vim /opt/my_nginx/conf/nginx.conf
(venv) [root@cs od]# cat /opt/my_nginx/conf/nginx.conf


#user  nobody;
worker_processes  1;

#error_log  logs/error.log;
#error_log  logs/error.log  notice;
#error_log  logs/error.log  info;

#pid        logs/nginx.pid;


events {
    worker_connections  1024;
}


http {
    include       mime.types;
    default_type  application/octet-stream;
    sendfile        on;
    keepalive_timeout  65;


    server {
        #SSL 默认访问端口号为 443
        listen 443 ssl;
        #请填写绑定证书的域名
        server_name www.neeo.cc;
        #请填写证书文件的相对路径或绝对路径
        ssl_certificate /od/neeo.cc_nginx/neeo.cc_bundle.crt;
        #请填写私钥文件的相对路径或绝对路径
        ssl_certificate_key /od/neeo.cc_nginx/neeo.cc.key;
        ssl_session_timeout 5m;
        #请按照以下协议配置
        ssl_protocols TLSv1.2 TLSv1.3;
        #请按照以下套件配置,配置加密套件,写法遵循 openssl 标准。
        ssl_ciphers ECDHE-RSA-AES128-GCM-SHA256:HIGH:!aNULL:!MD5:!RC4:!DHE;
        ssl_prefer_server_ciphers on;
        gzip on;
        gzip_static on;
        gzip_min_length 1k;
        gzip_vary on;
        gzip_proxied any;
        gzip_comp_level 9;
        gzip_buffers 4 16k;
        gzip_http_version 1.0;
        # 进行压缩的文件类型
        gzip_types text/plain text/css application/json application/javascript text/xml application/xml application/xml+rss text/javascript image/jpeg image/gif image/png image/svg+xml;
        # 访问https://www.nee.cc的请求转发给uwsgi
        location / {
            include uwsgi_params;
            uwsgi_pass 127.0.0.1:8000;
        }
        location /static {
            alias /od/allstatic/;
        }
     }

    server {
        listen 80;
        #请填写绑定证书的域名
        server_name www.neeo.cc;
        #把http的域名请求转成https
        return 301 https://$host$request_uri;
    }
}
2
3
4
5
6
7
8
9
10
11
12
13
14
15
16
17
18
19
20
21
22
23
24
25
26
27
28
29
30
31
32
33
34
35
36
37
38
39
40
41
42
43
44
45
46
47
48
49
50
51
52
53
54
55
56
57
58
59
60
61
62
63
64
65
66
67
68
69
70
然后将nginx和uwsgi都重新启动下:
cd /od
pkill -9 uwsgi
nohup /od/venv/bin/uwsgi --ini ./script/uwsgi.ini >/dev/null 2>&1 &
nginx -t
nginx -s reload
2
3
4
5
# 常见报错
# settings.DATABASES is improperly configured. Please supply the ENGINE value. Check settings documentation for more details.
windows11 + python3.10 + pycharm2023
配置文件中,数据库的配置参数有误,甚至没有配置,检查settins.py中的数据库连接配置。
# Error 10061 connecting to 82.157.21.45:6379. 由于目标计算机积极拒绝,无法连接。.
本地无法连接远程的Redis服务。
排错思路:
- 检查云服务器安全组是否放开6379端口
- 检查你项目的Redis配置,否是有误。
- 检查云服务器上的Redis配置文件的bind命令是否监听的是
bind 0.0.0.0。
注意,以上都动作有调整之后,都要想着重启Redis服务,相关命令。
pkill redis
redis-server /opt/redis6379/conf/redis6379.conf
vim /opt/redis6379/conf/redis6379.conf
2
3
# ImportError: urllib3 v2.0 only supports OpenSSL 1.1.1+, currently the 'ssl' module is compiled with 'OpenSSL 1.0.2
这个问题是urllib3的版本高,依赖openssl的版是1.1.1+
解决方式有两个:
- 升级openssl,这个暂时不推荐。
- 降级urllib3,选择这个。
原来的urllib3的版本是2.0.3,现在降到1.26.15
pip install urllib3==1.26.15
2